Configure Marketo Integration for Agent Writeback
This page is part of RevSure’s Comprehensive FAQs, your all-in-one hub for answers on capabilities, data, security, scalability, configurability, and more. Click here to return to the FAQ home.
This page is part of RevSure’s Comprehensive FAQs, your all-in-one hub for answers on capabilities, data, security, scalability, configurability, and more. Click here to return to the FAQ home.


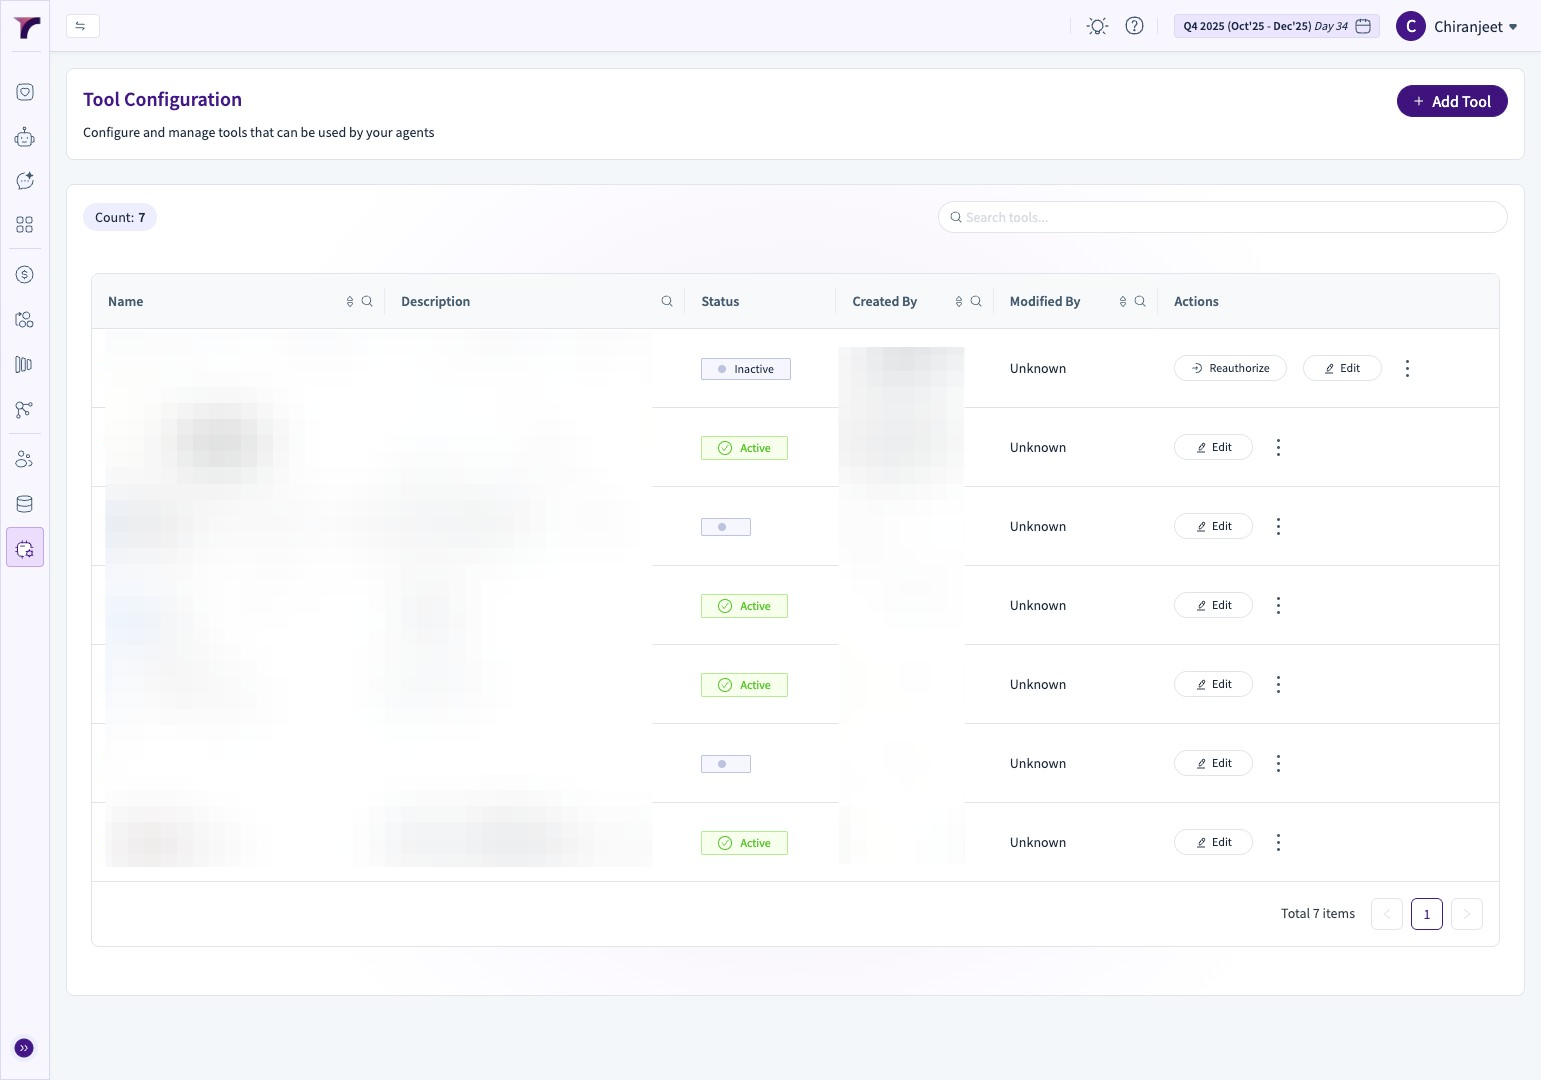
1. Navigate to Tool Config in Agent Hub
2. Click "Tool Config"
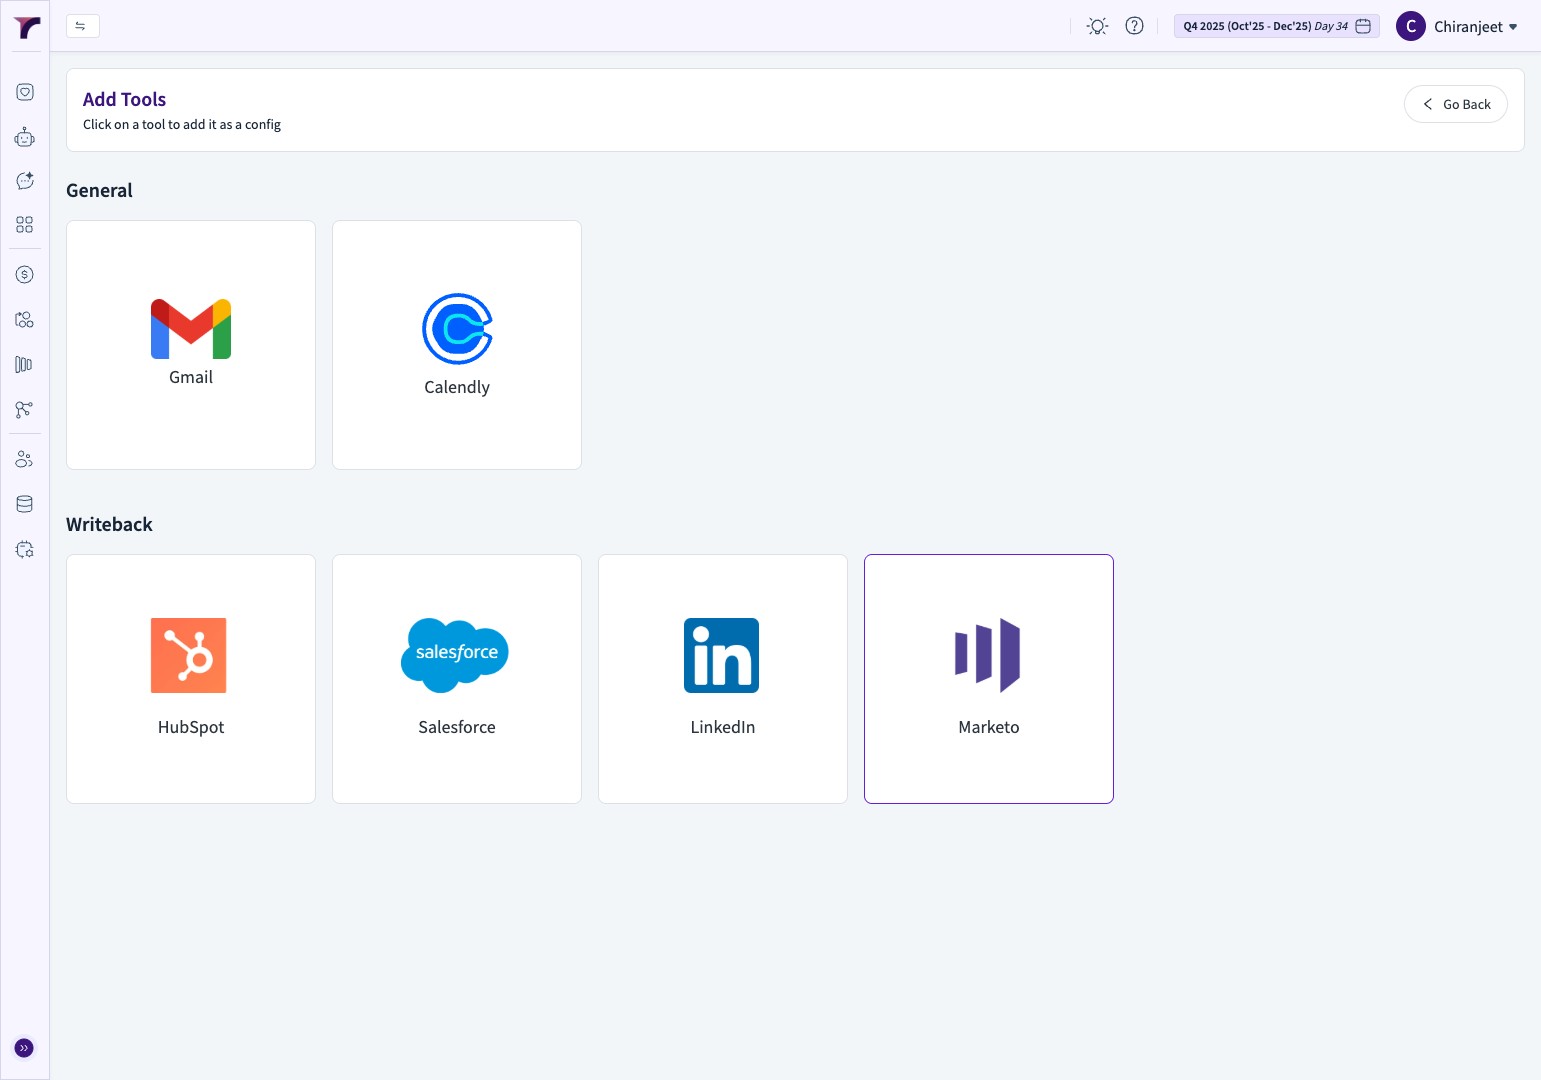
3. Click "Add Tool"
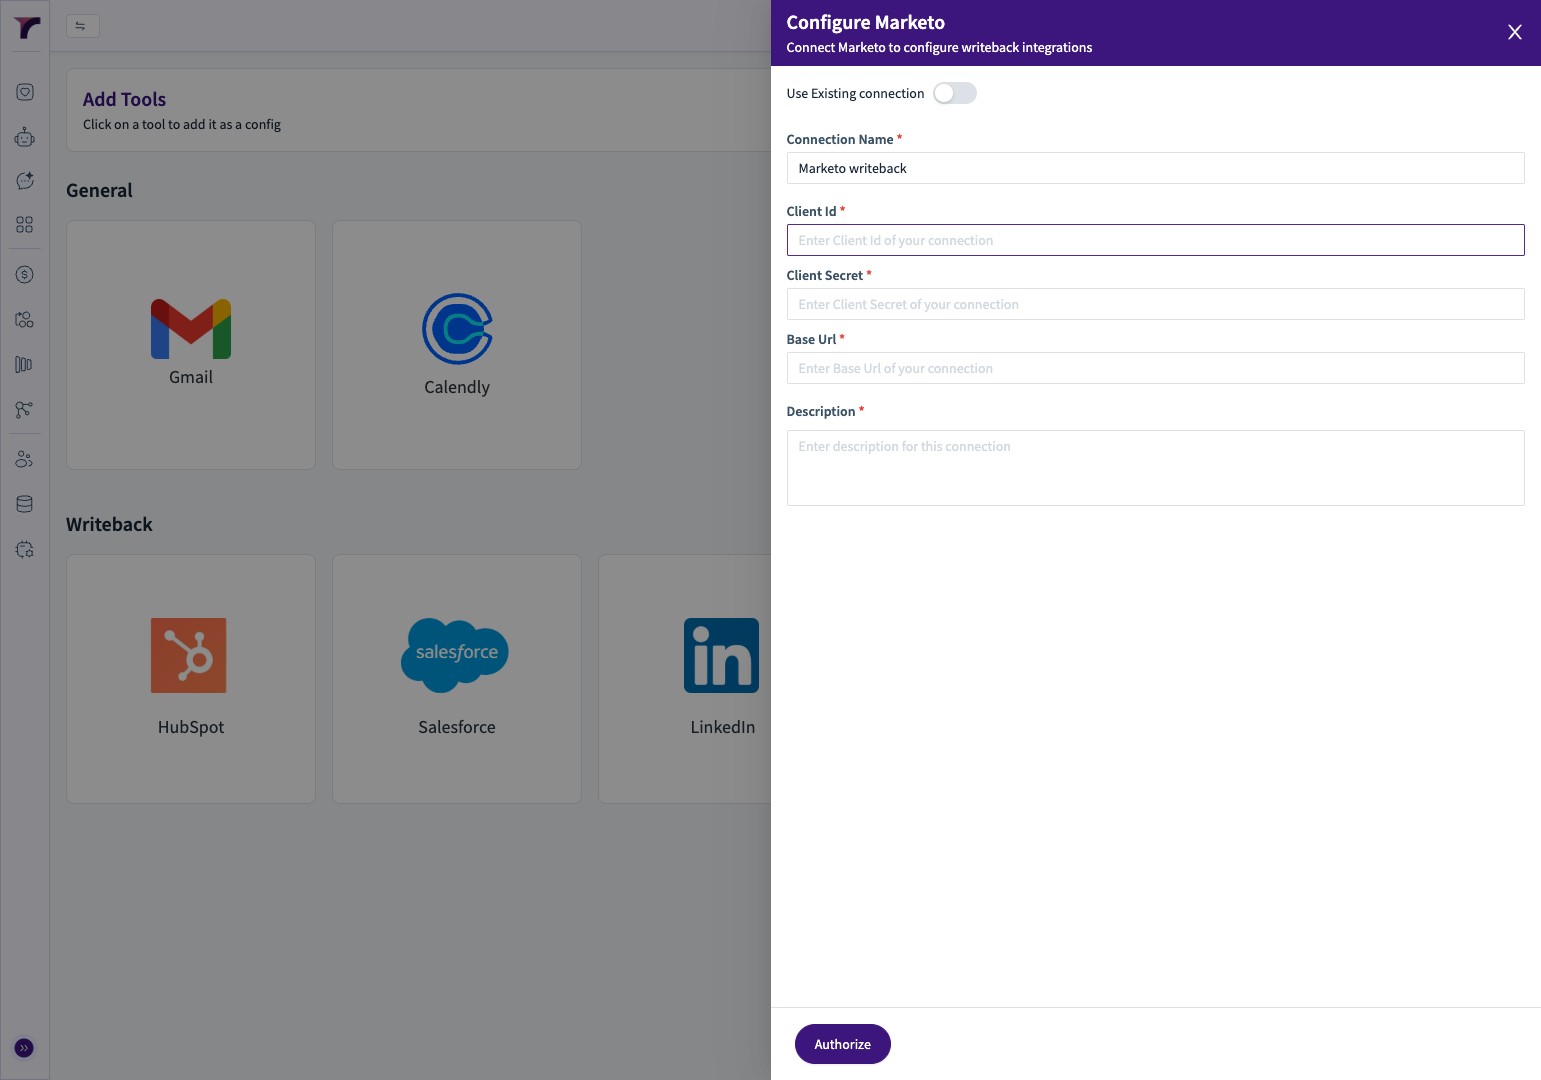
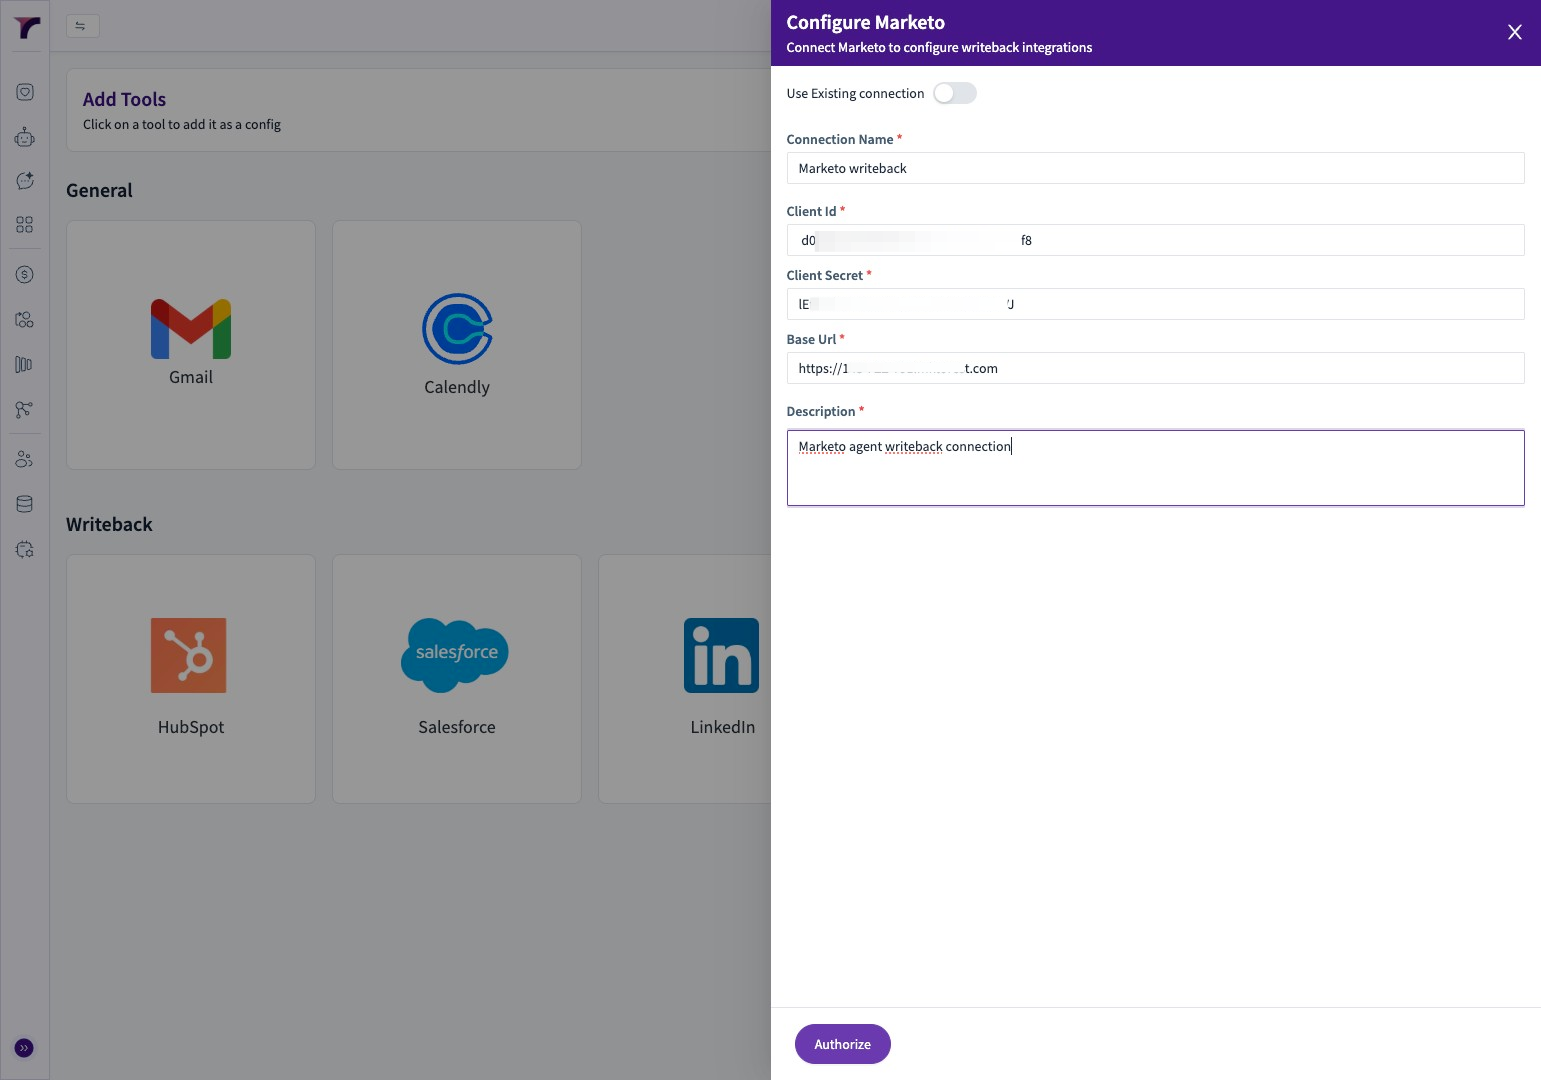
4. Click this image.
5. Click the "Connection Name *" field.

6. Type "Marketo writeback"

7. Click the "Client Id *" field.
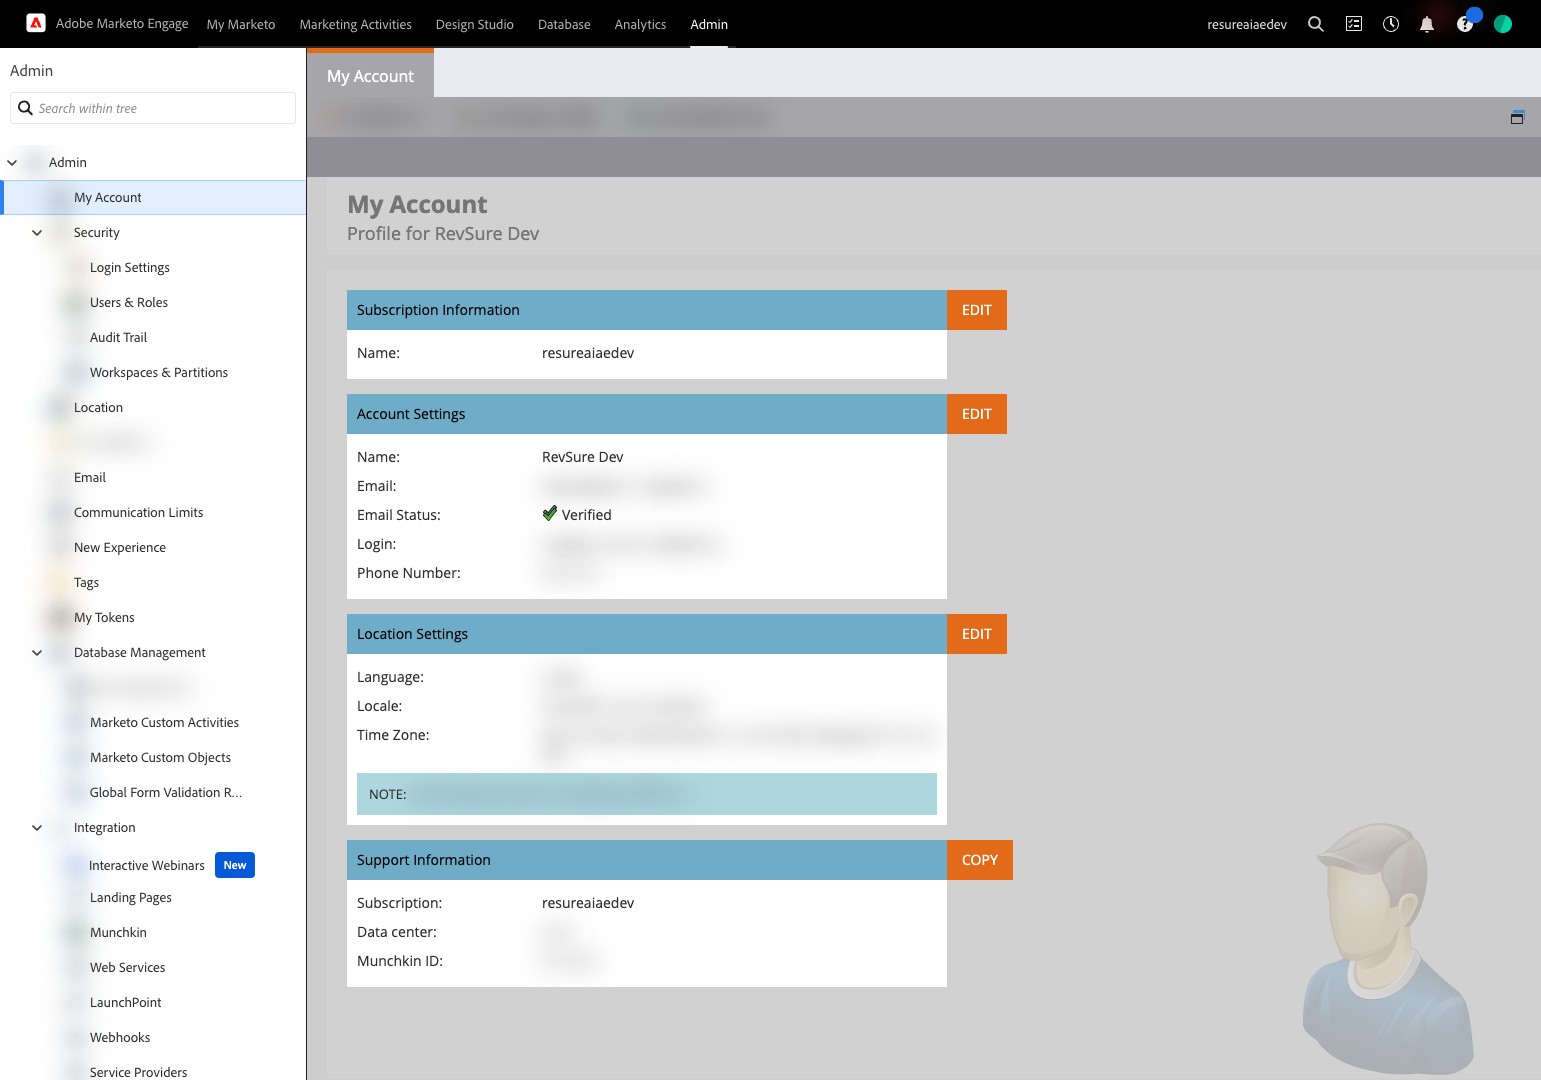
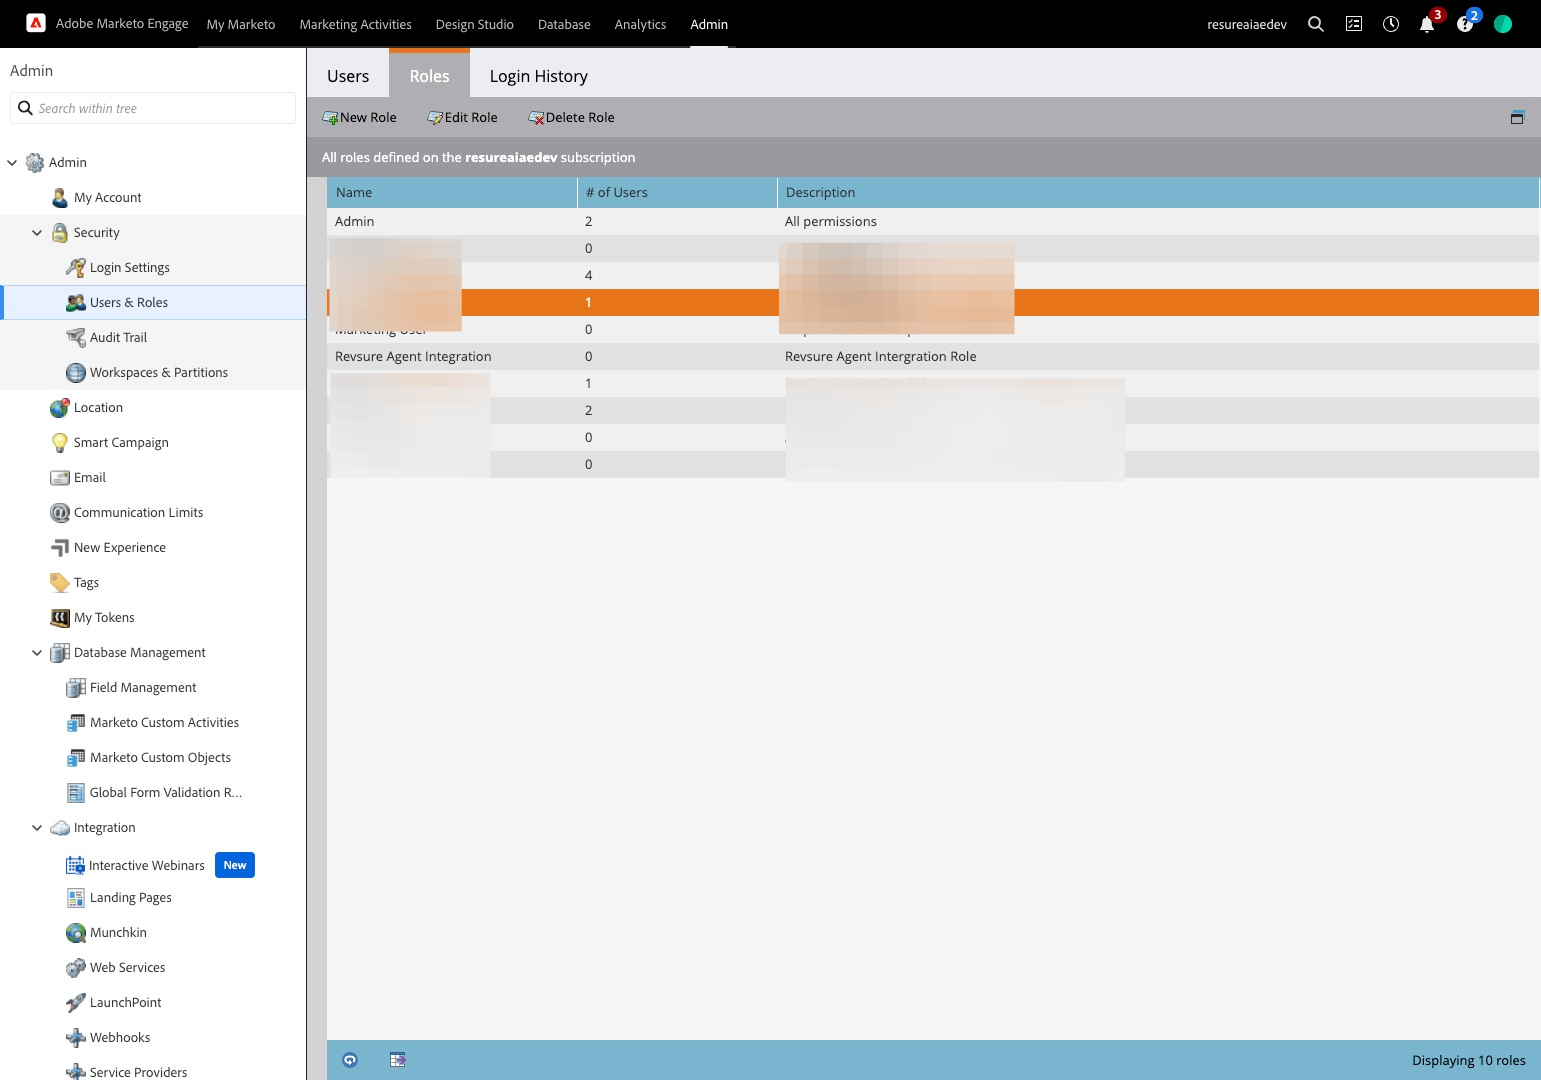
8. Navigate to your Marketo Instance. We will be creating the following : Role, User, Web Service
9. Click "Admin"
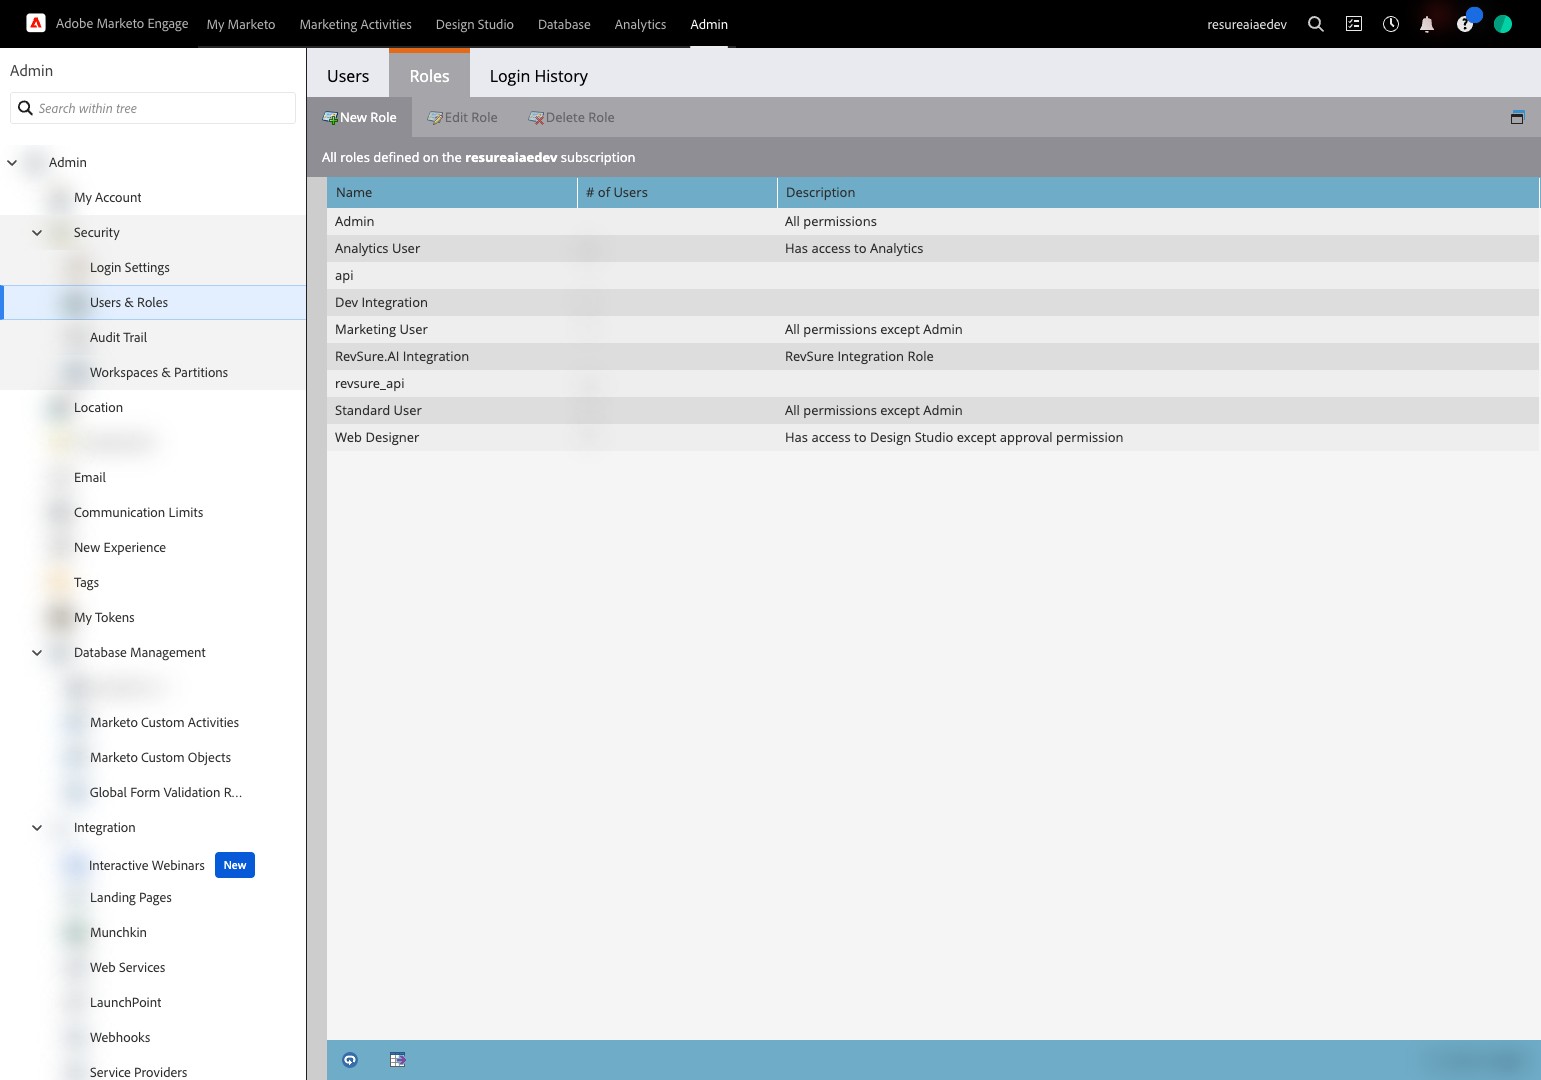
10. Click "Users & Roles"

11. Click "Roles"

12. Click "New Role"
13. Click the "Role Name:" field.

14. Type "Revsure Agent Integration"

15. Click the "Description:" field.

16. Type "Revsure Agent Intergration Role"
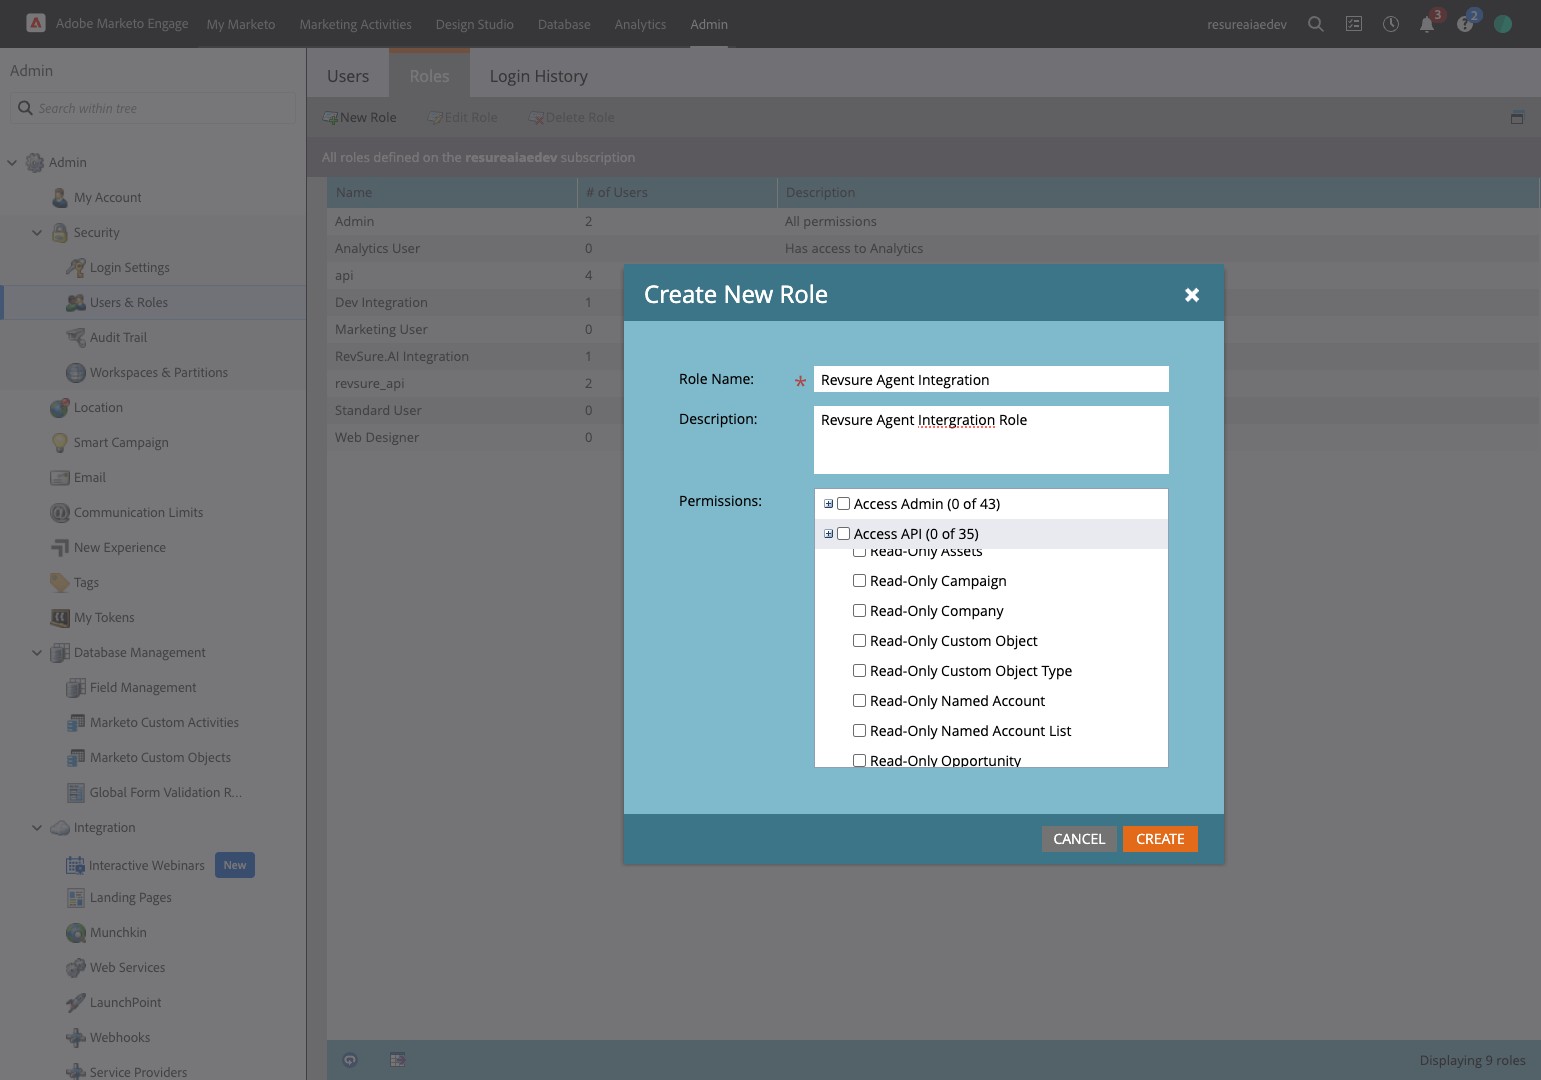
17. Click this image.

18. Click this checkbox.

19. Click this checkbox.

20. Click "Create"

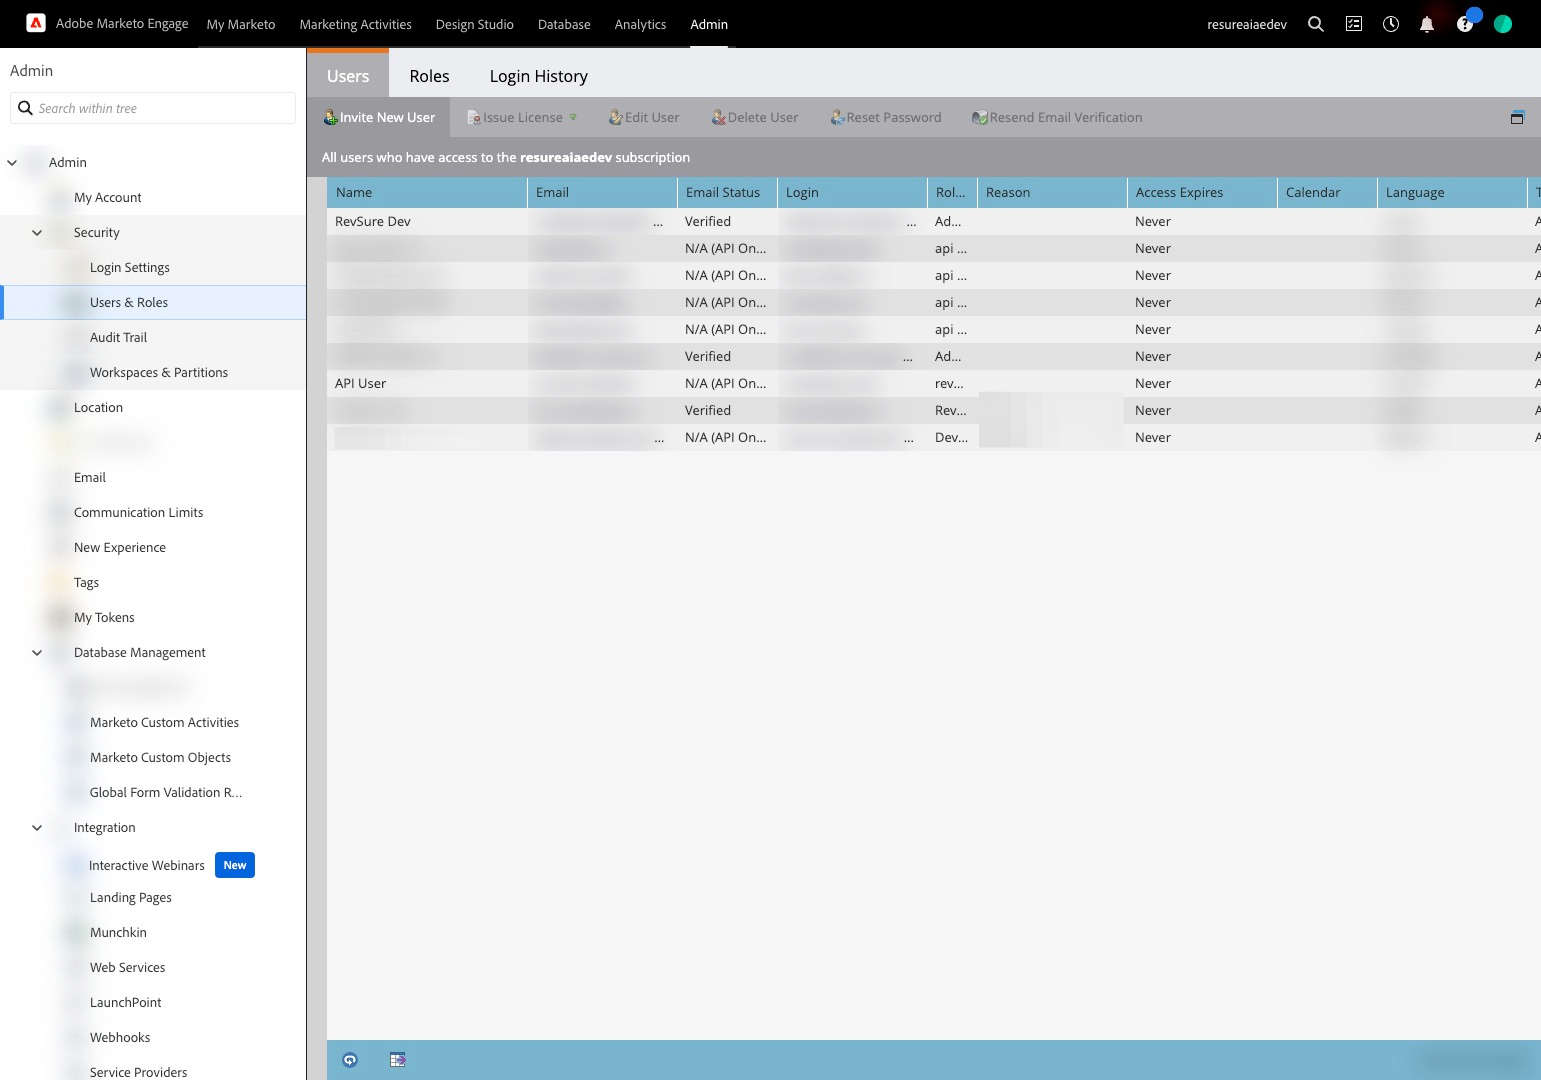
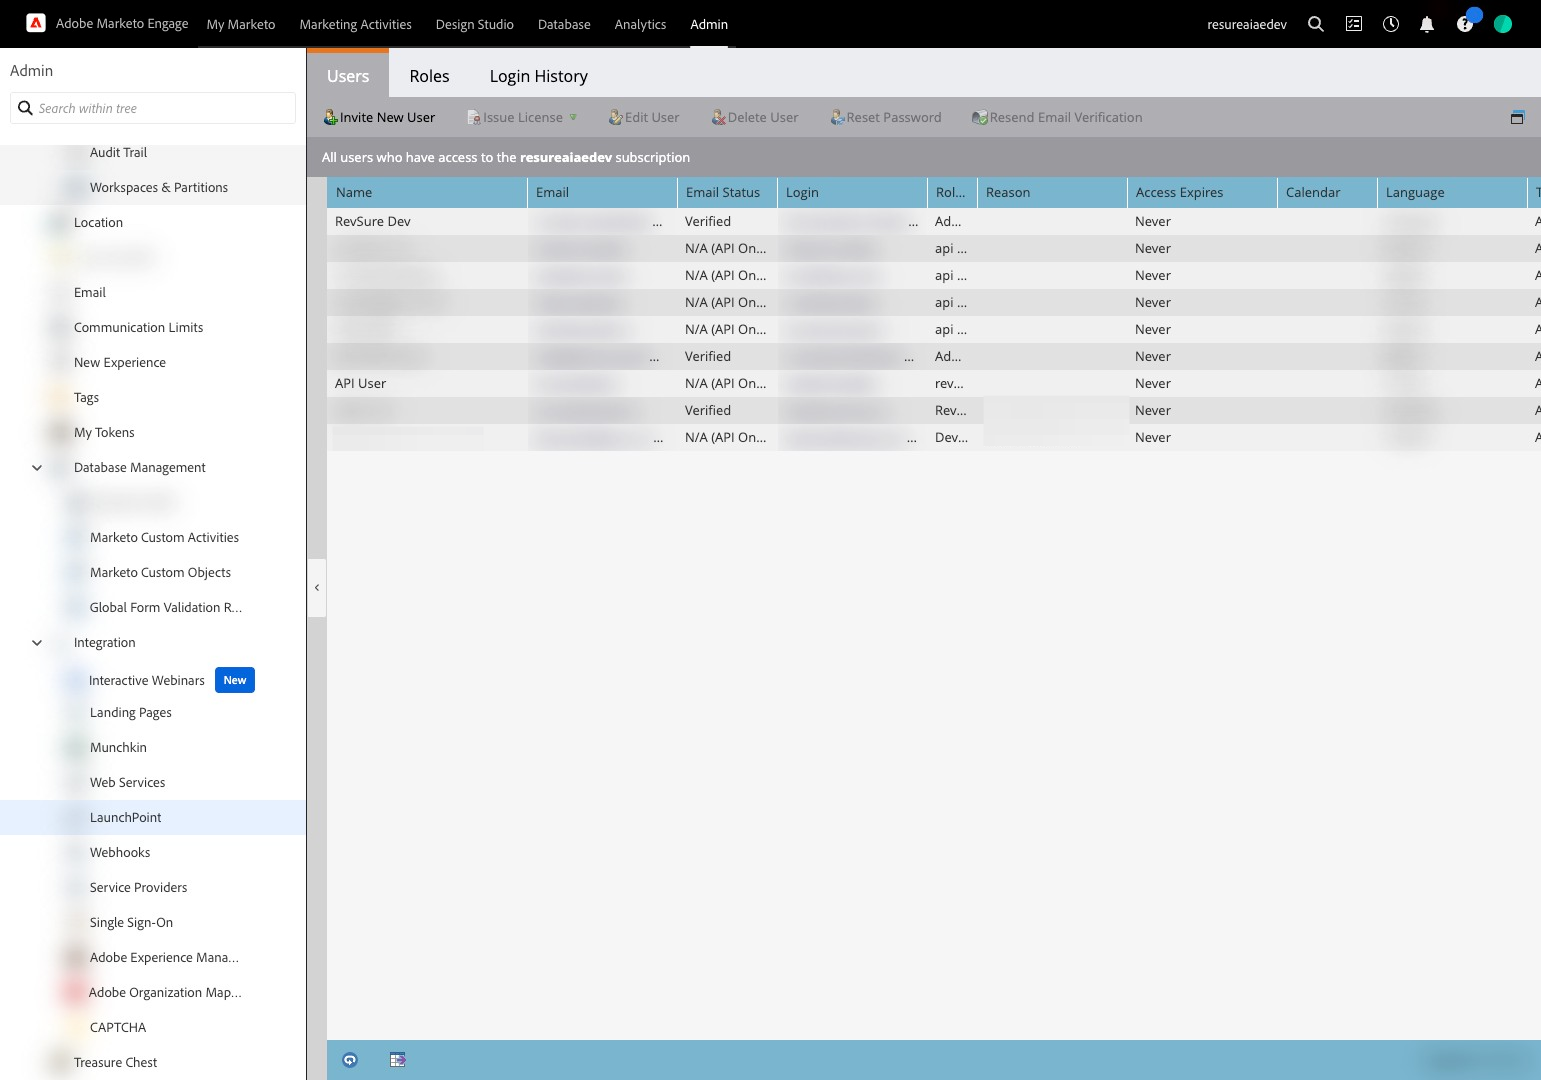
21. Click "Users"
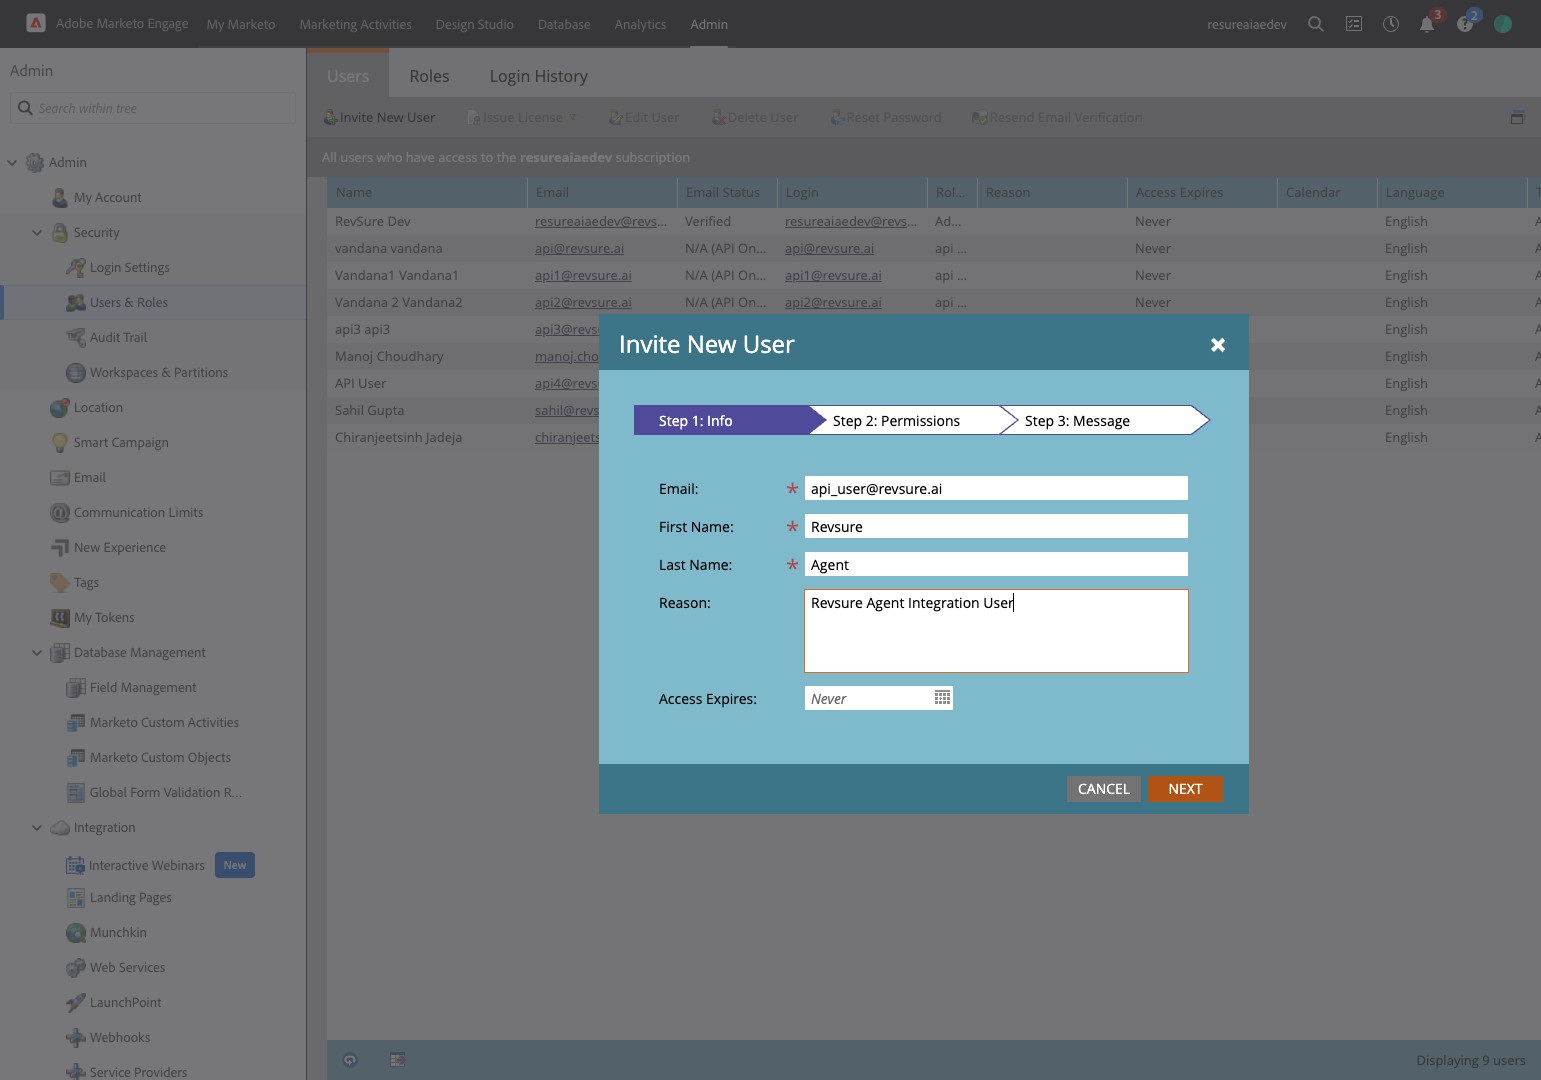
22. Click "Invite New User"
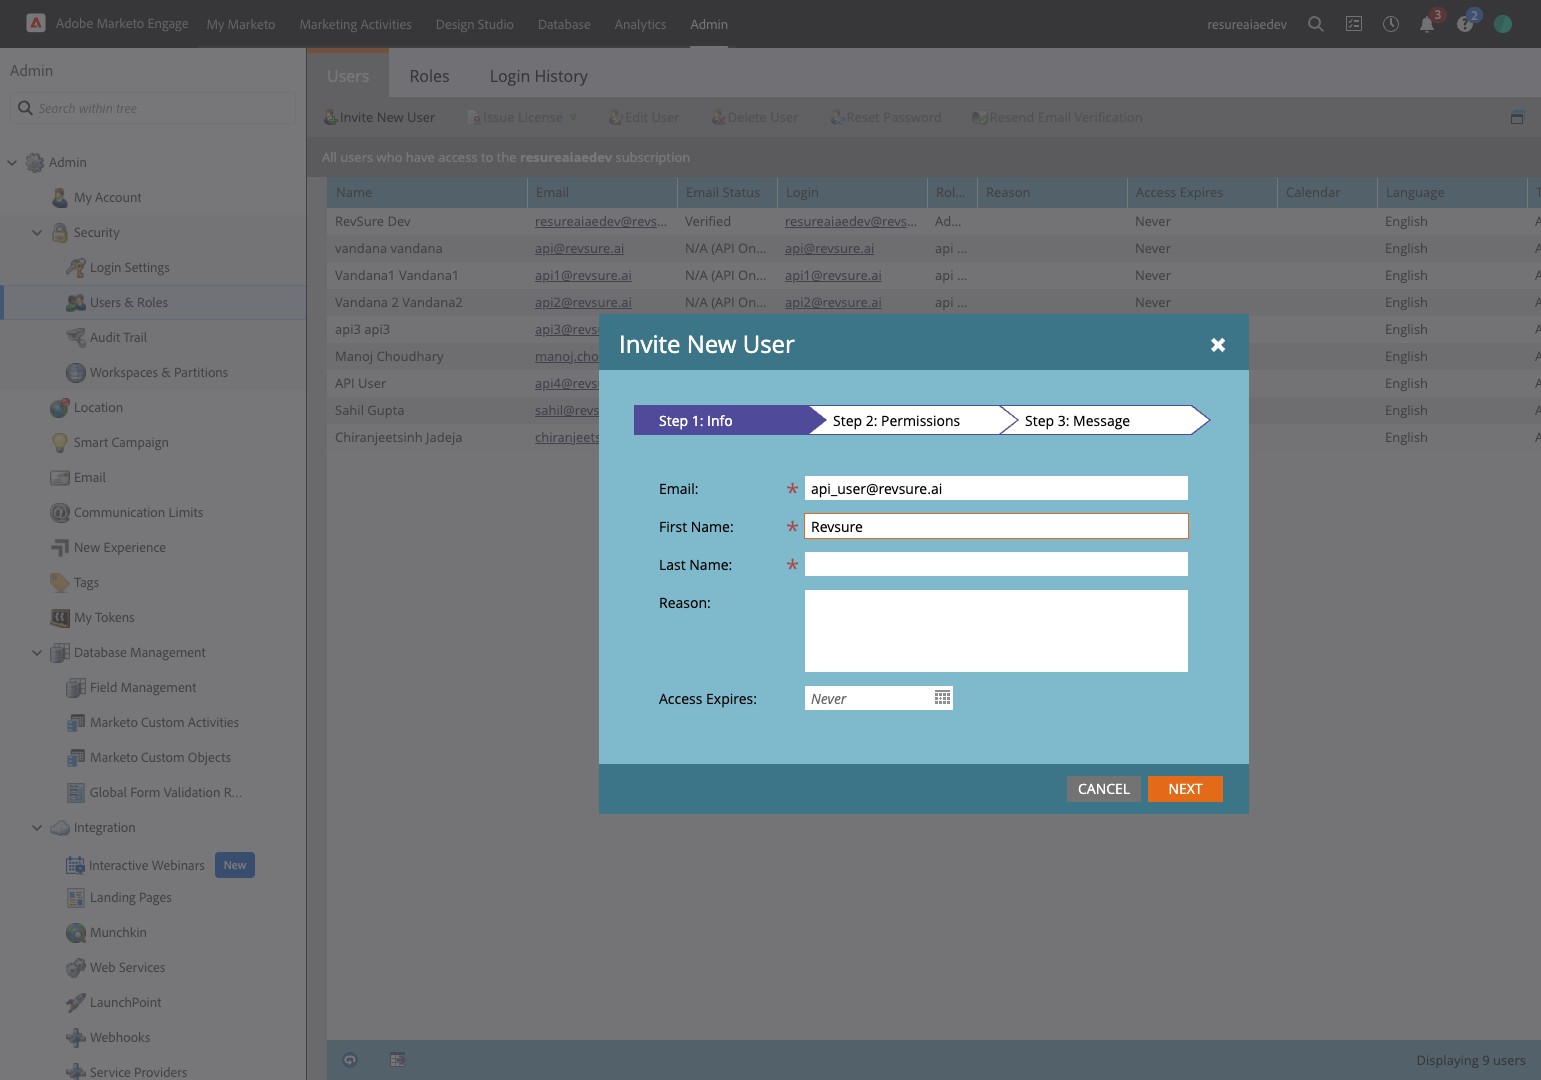
23. Add Email, First Name, Last Name and Reason and click next
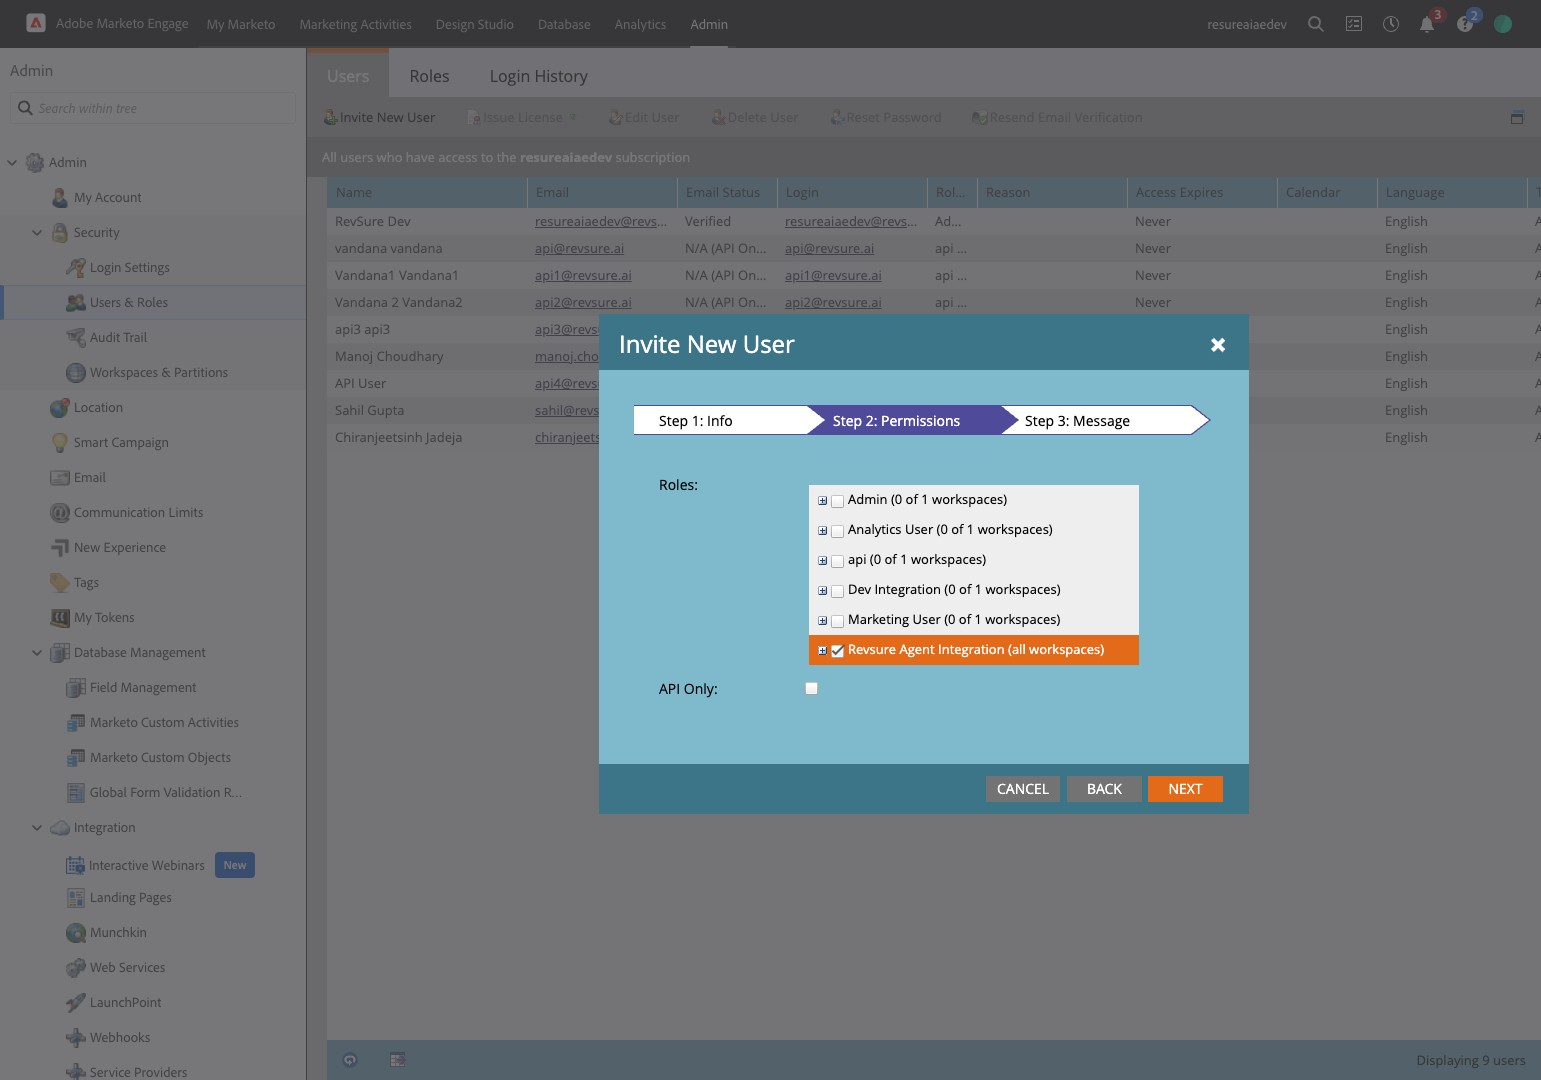
24. In the Step 2
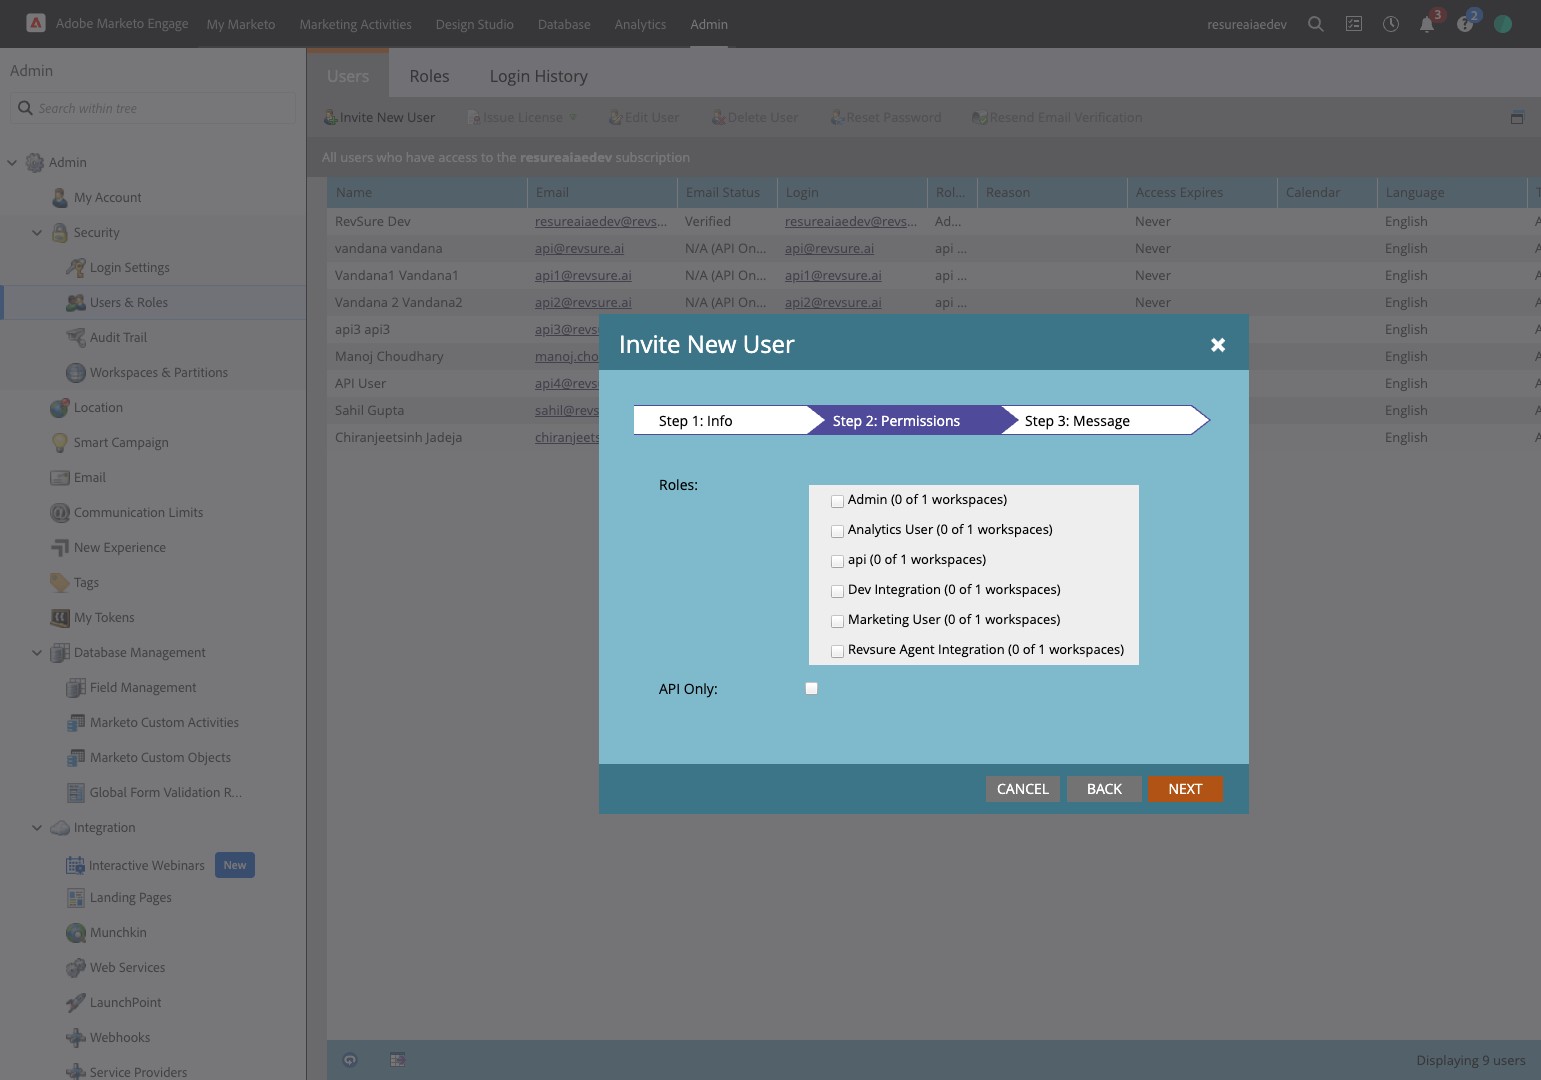
25. Click the User created by you
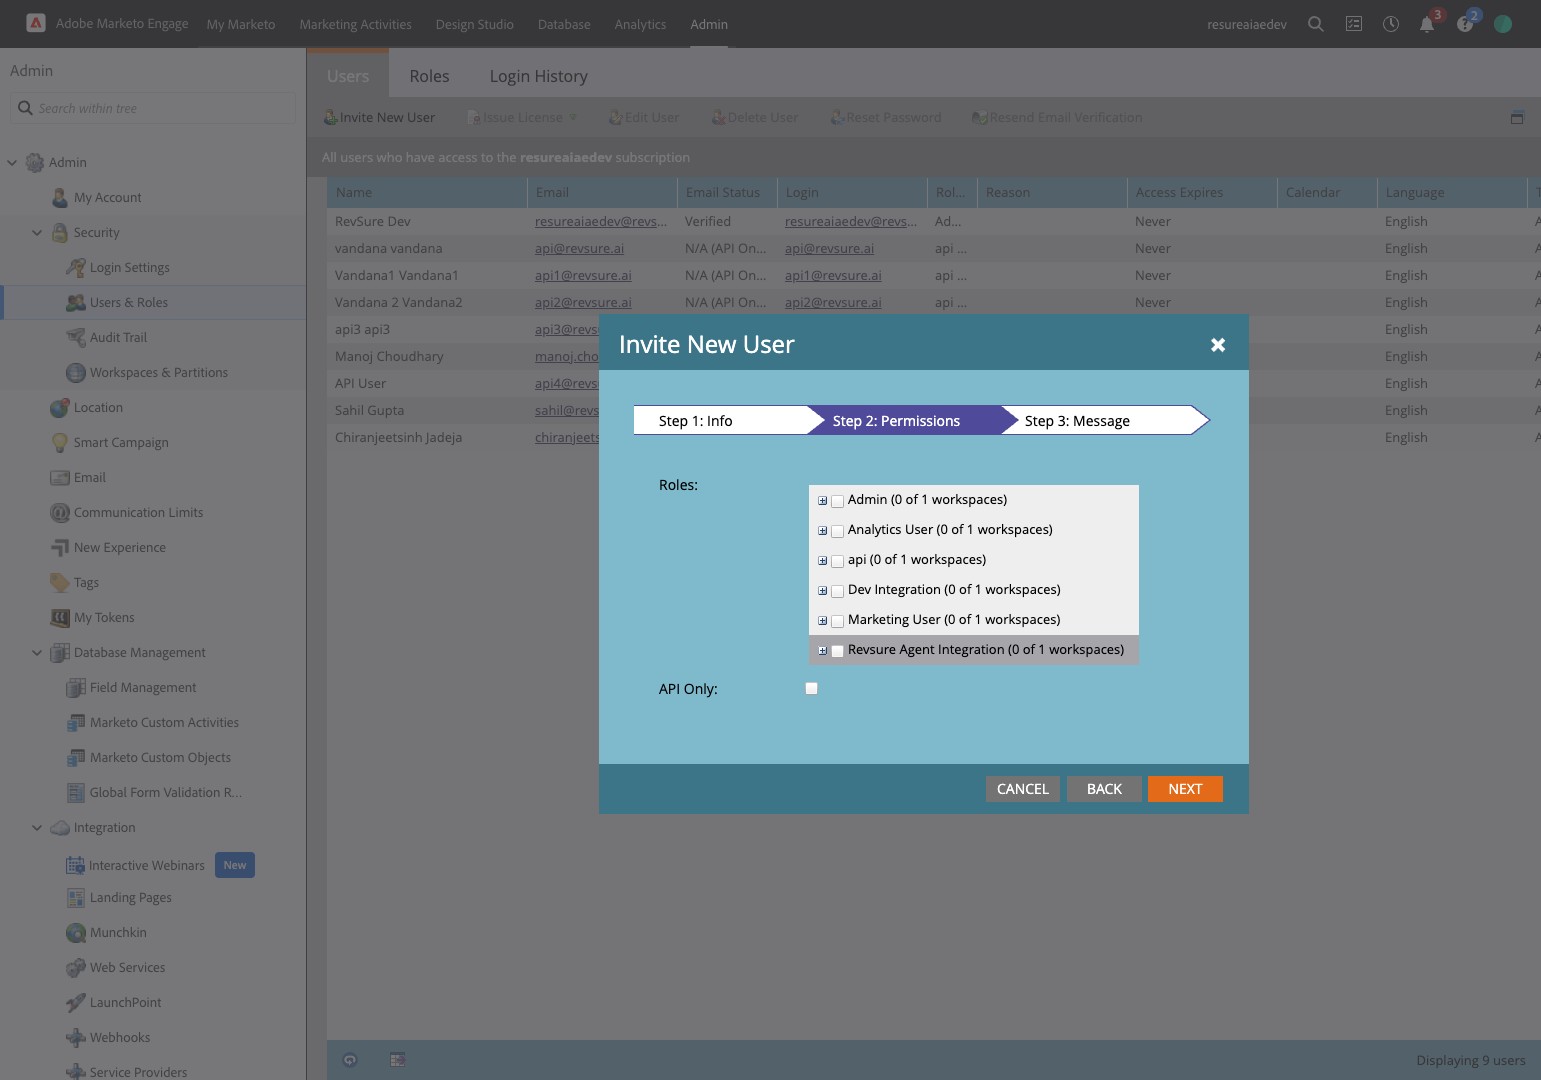
26. Click "Next"
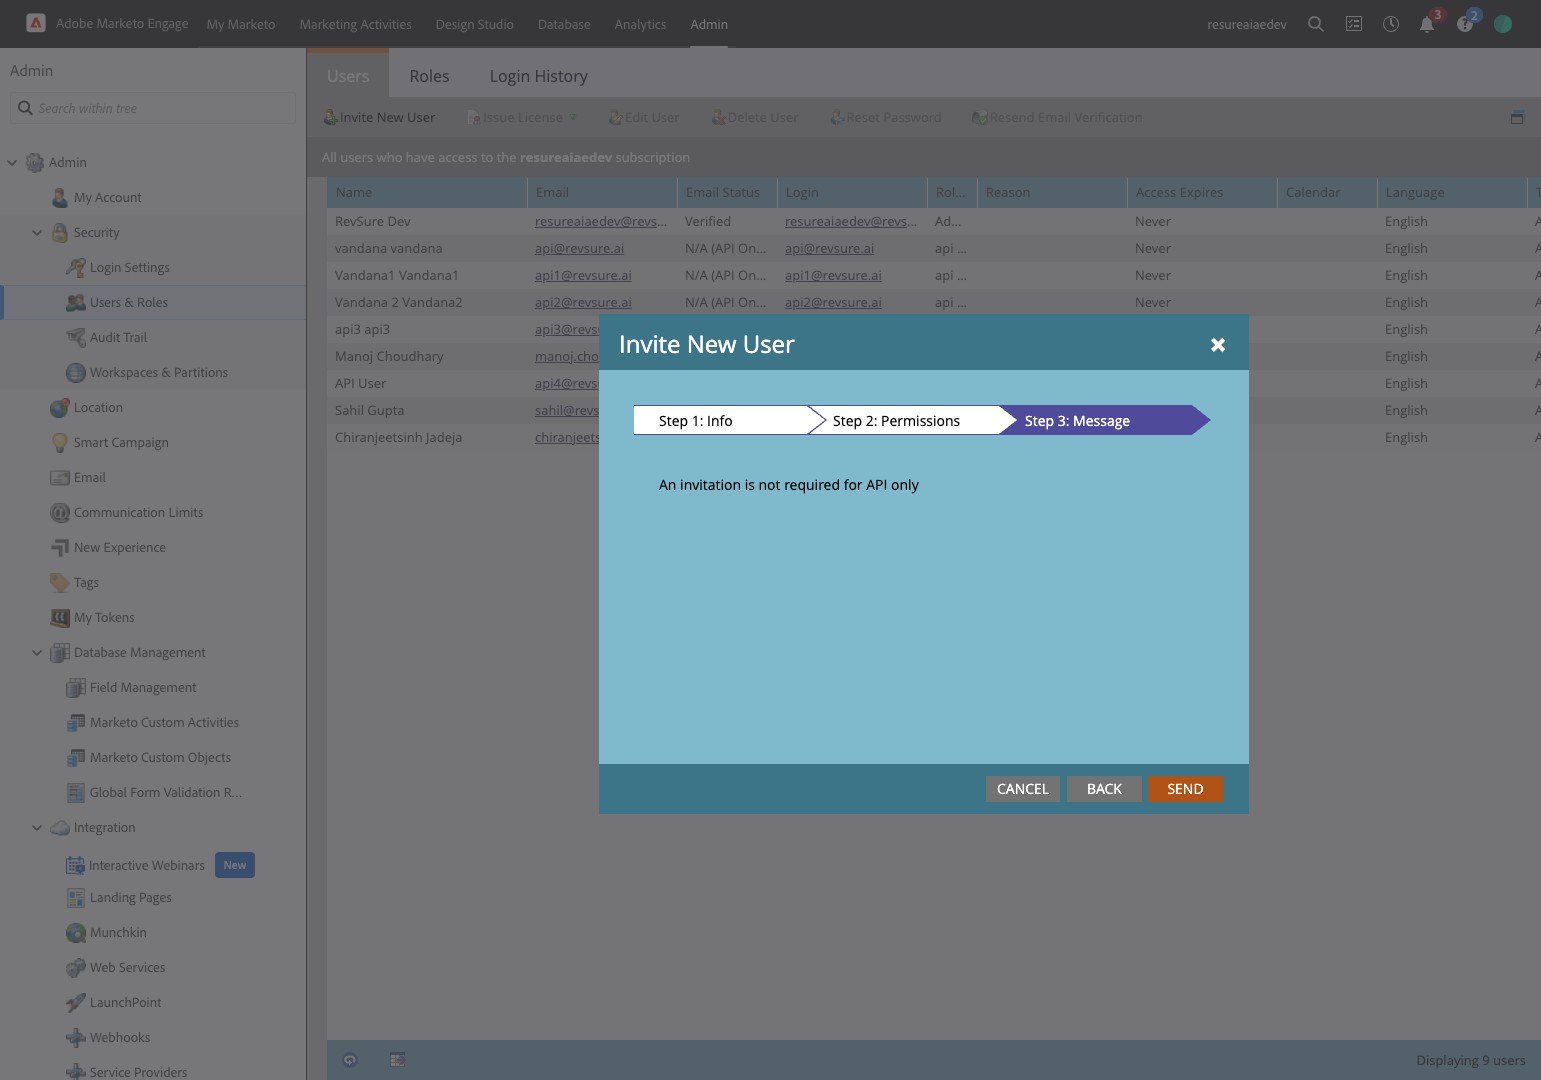
27. Click the "API Only:" field.
28. Click "Next"

29. Click "Send"
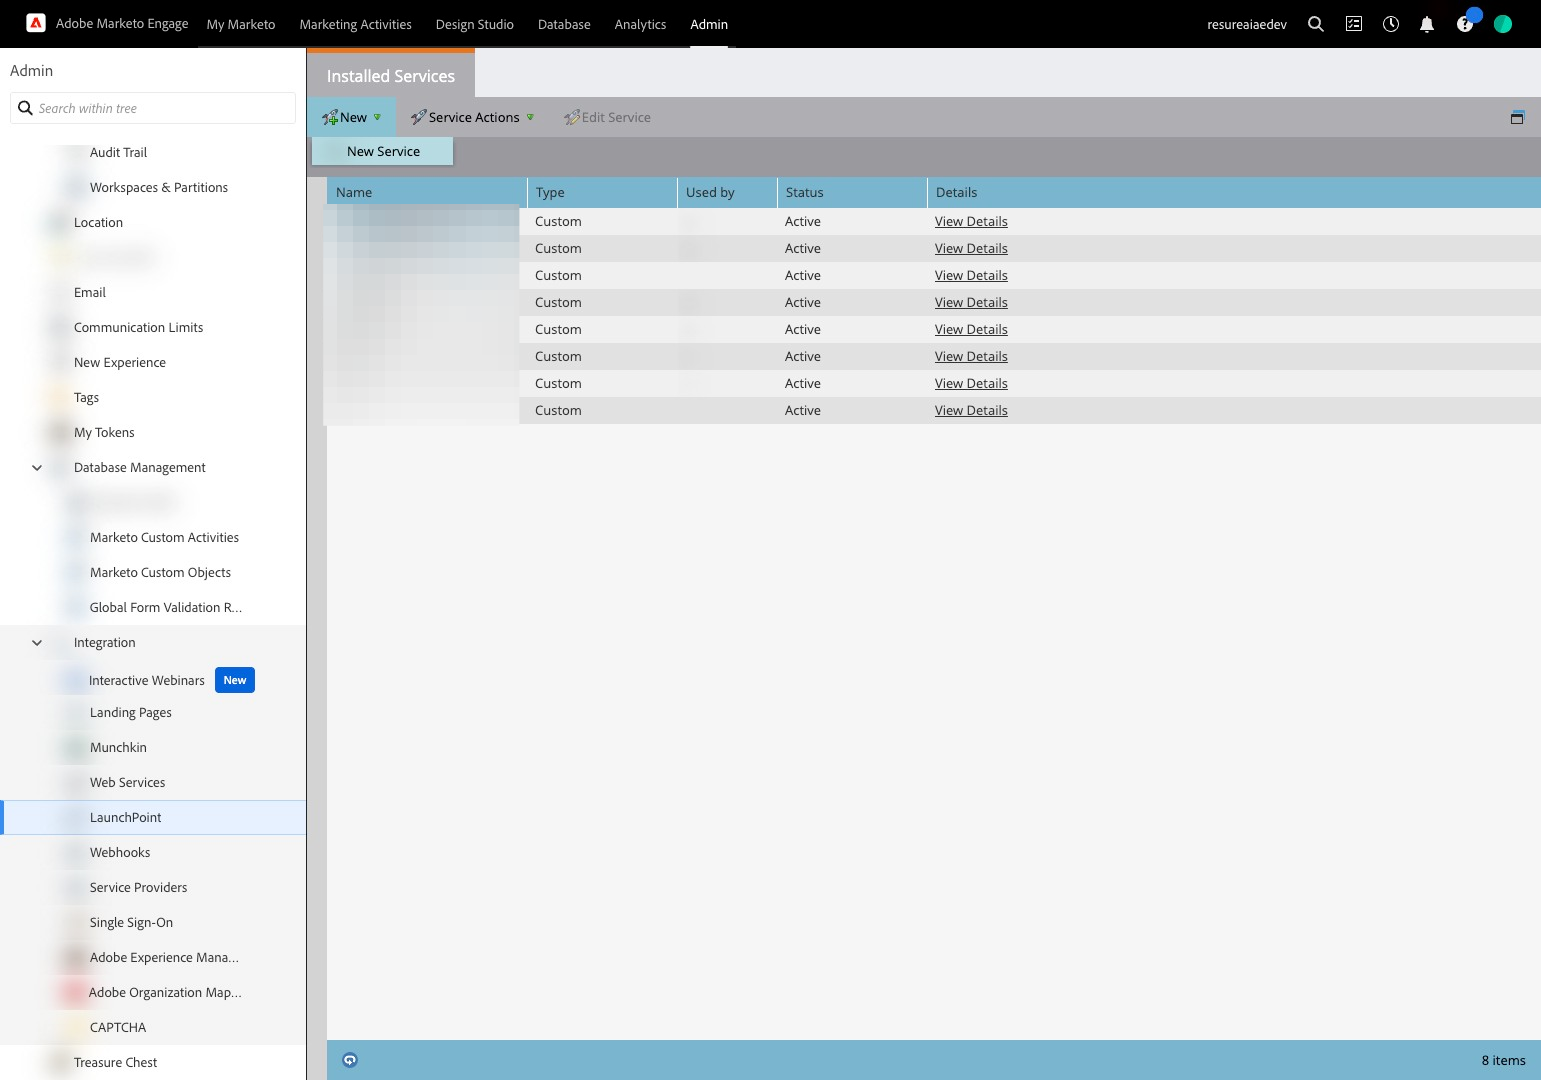
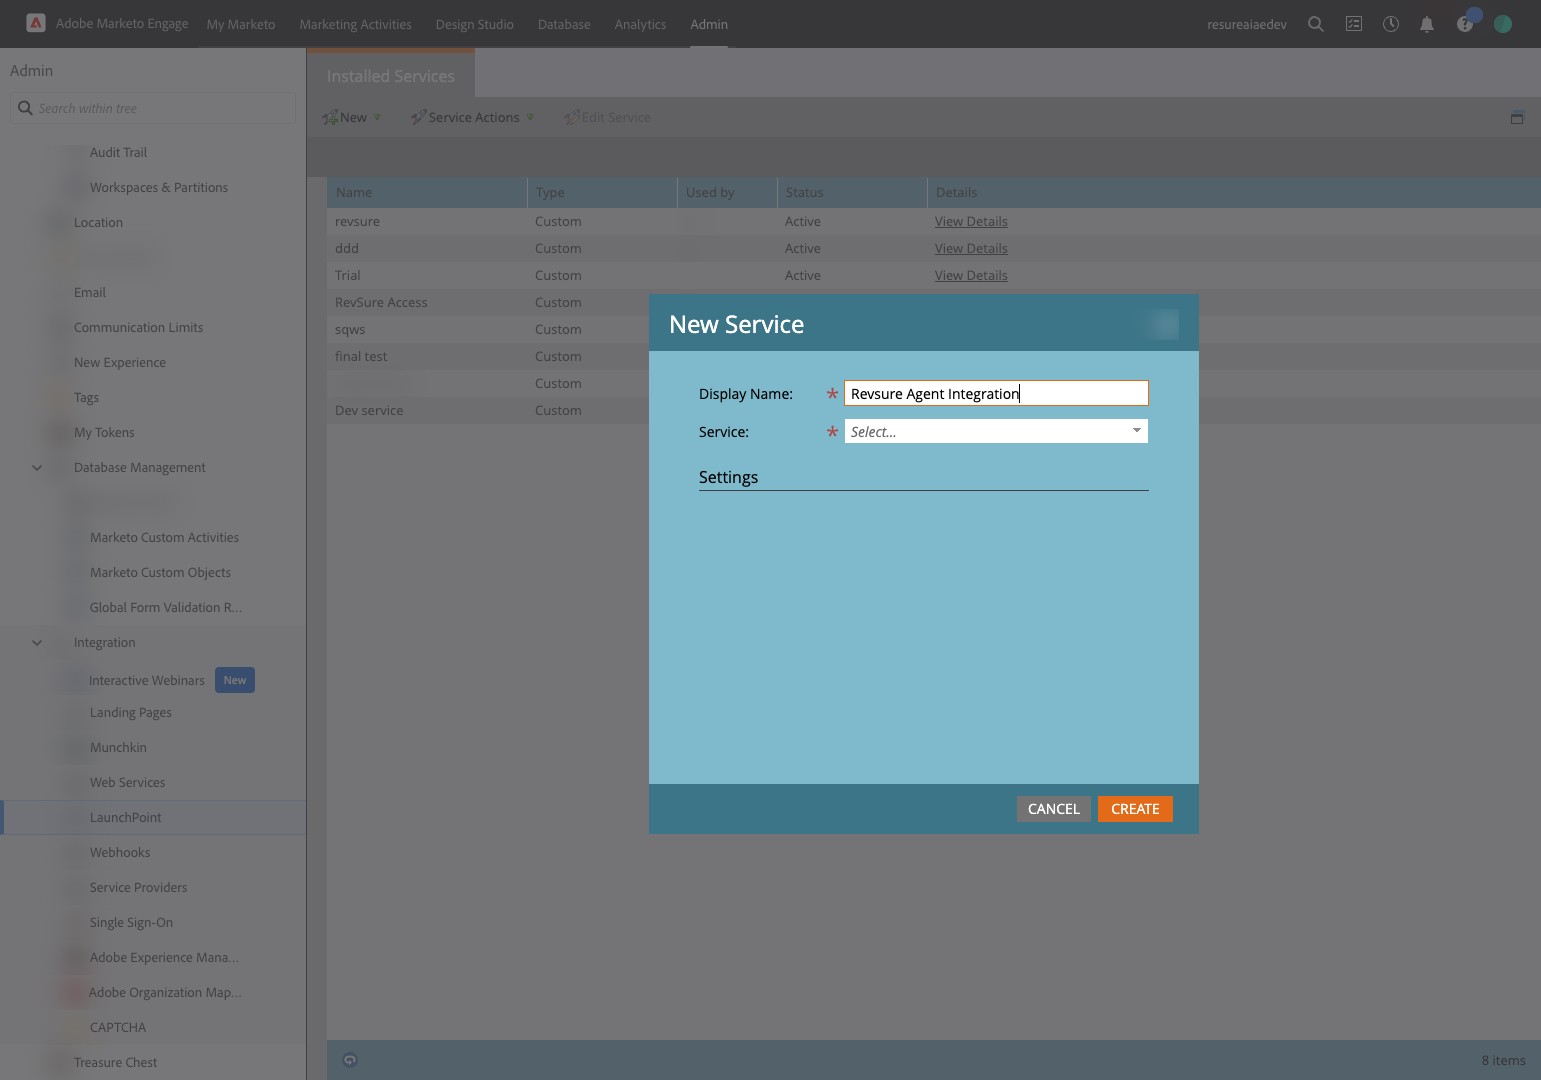
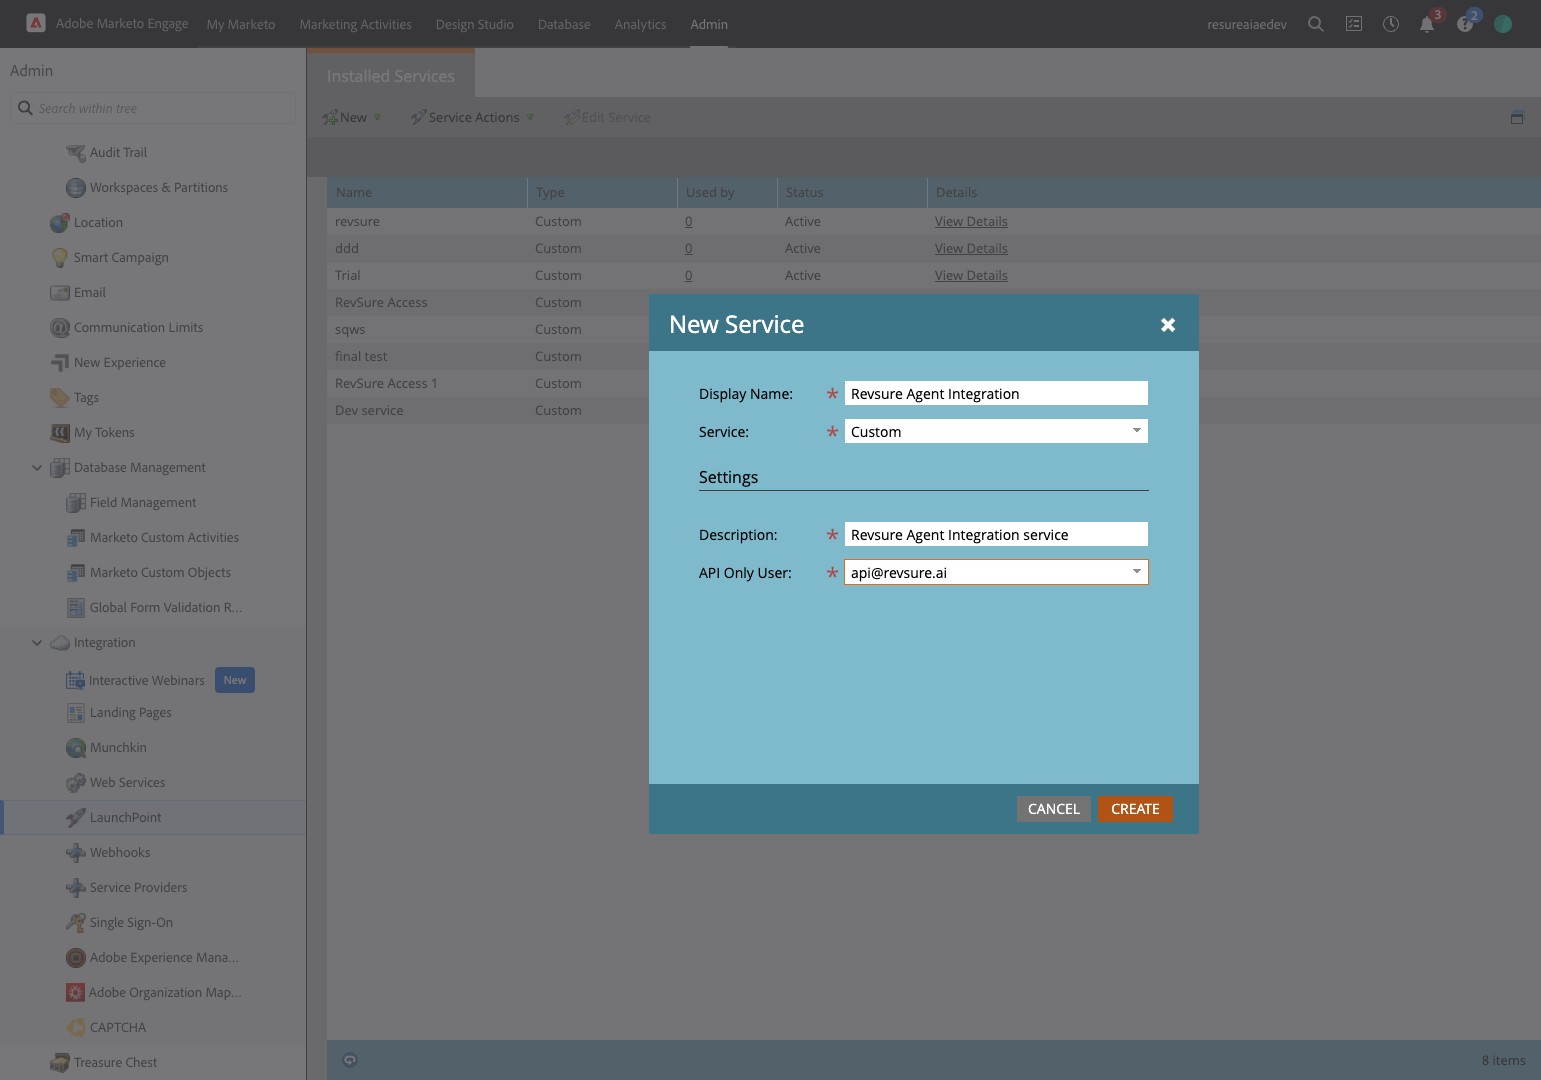
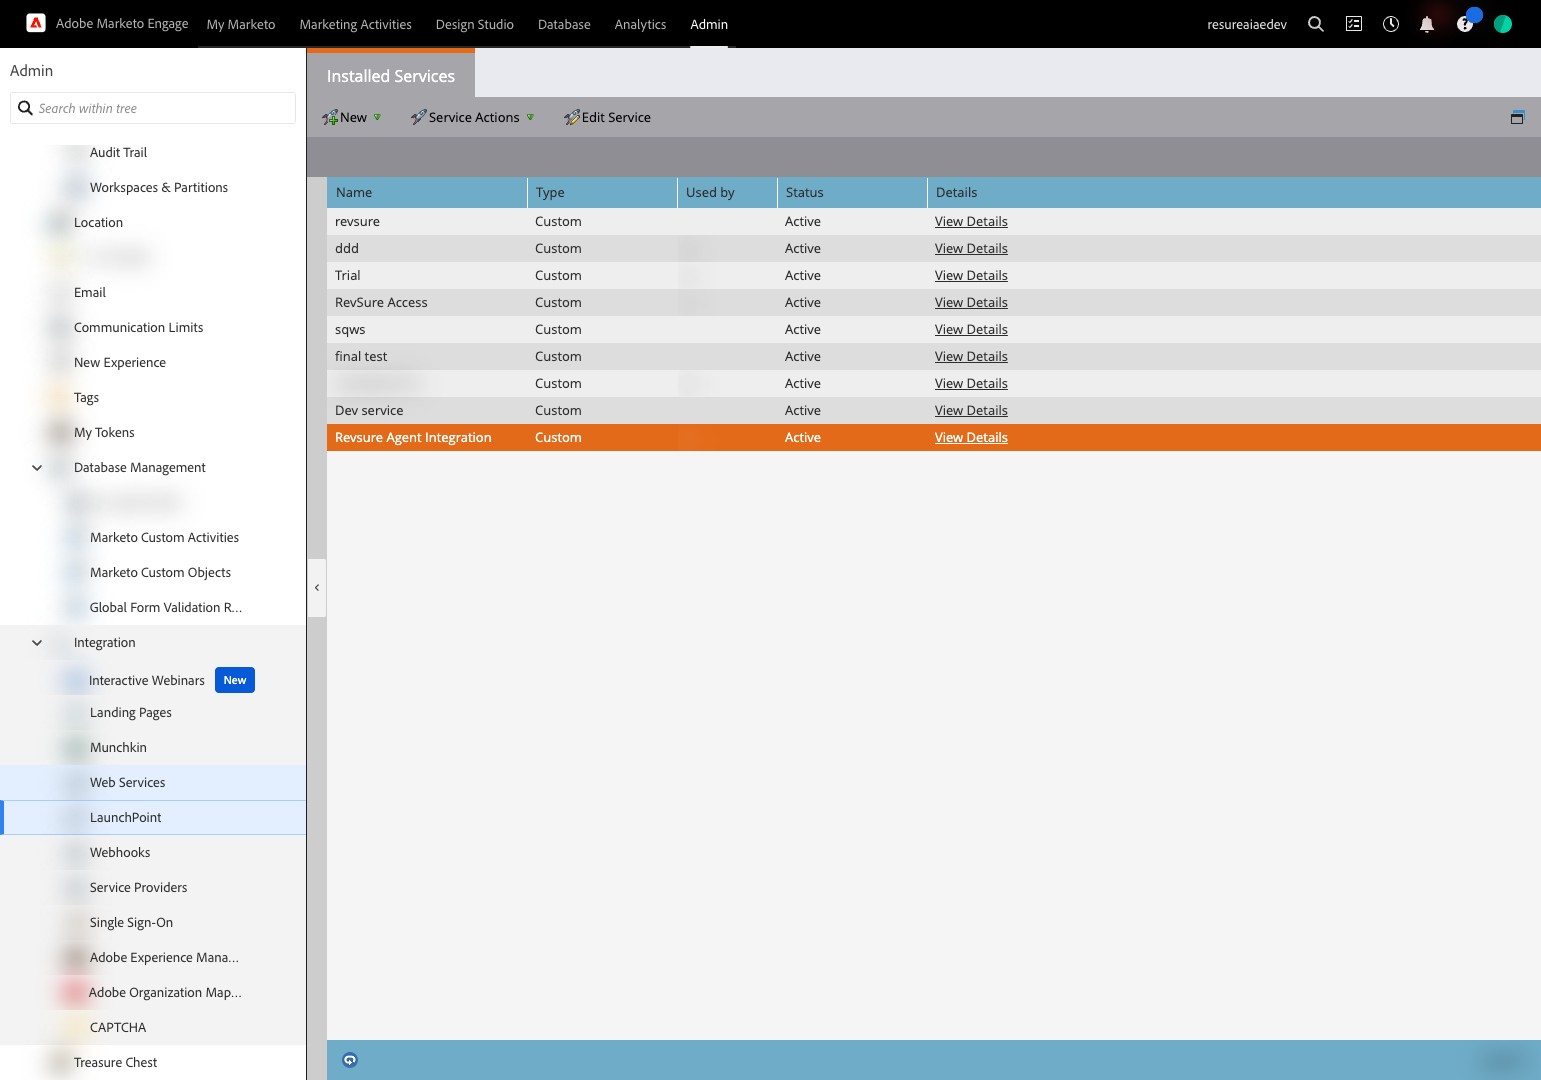
30. Click "LaunchPoint"
31. Click "New"

32. Click "New Service"
33. Type "Revsure Agent Integration"
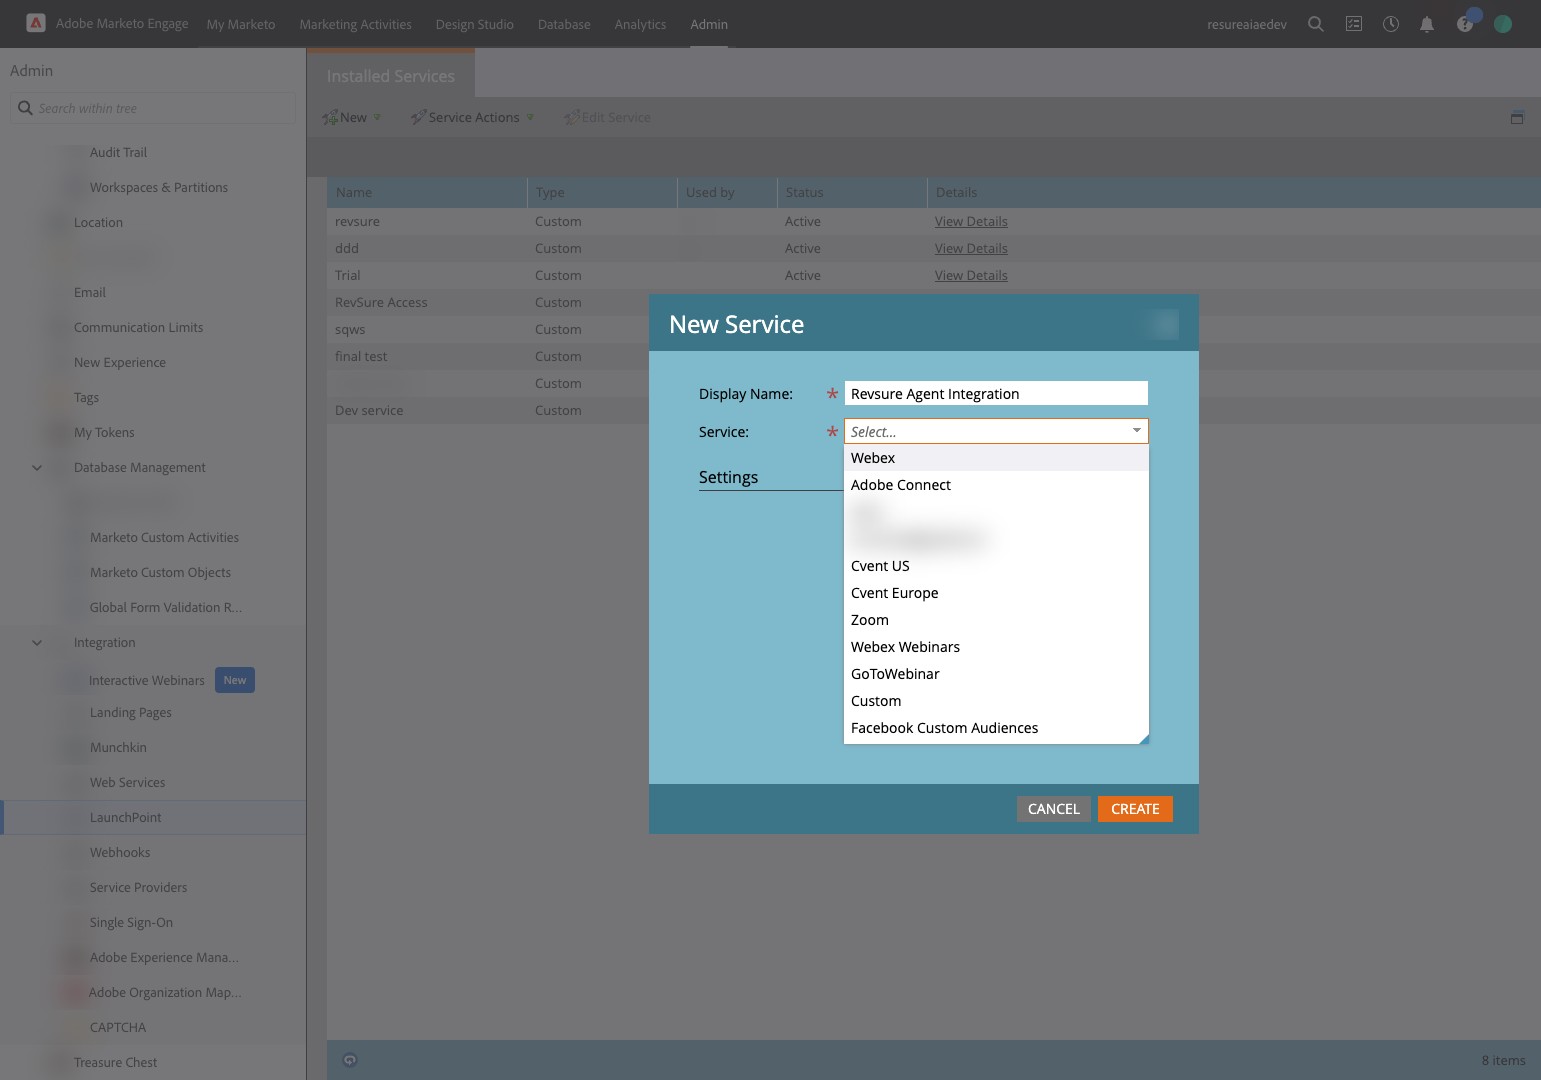
34. Click "Custom"
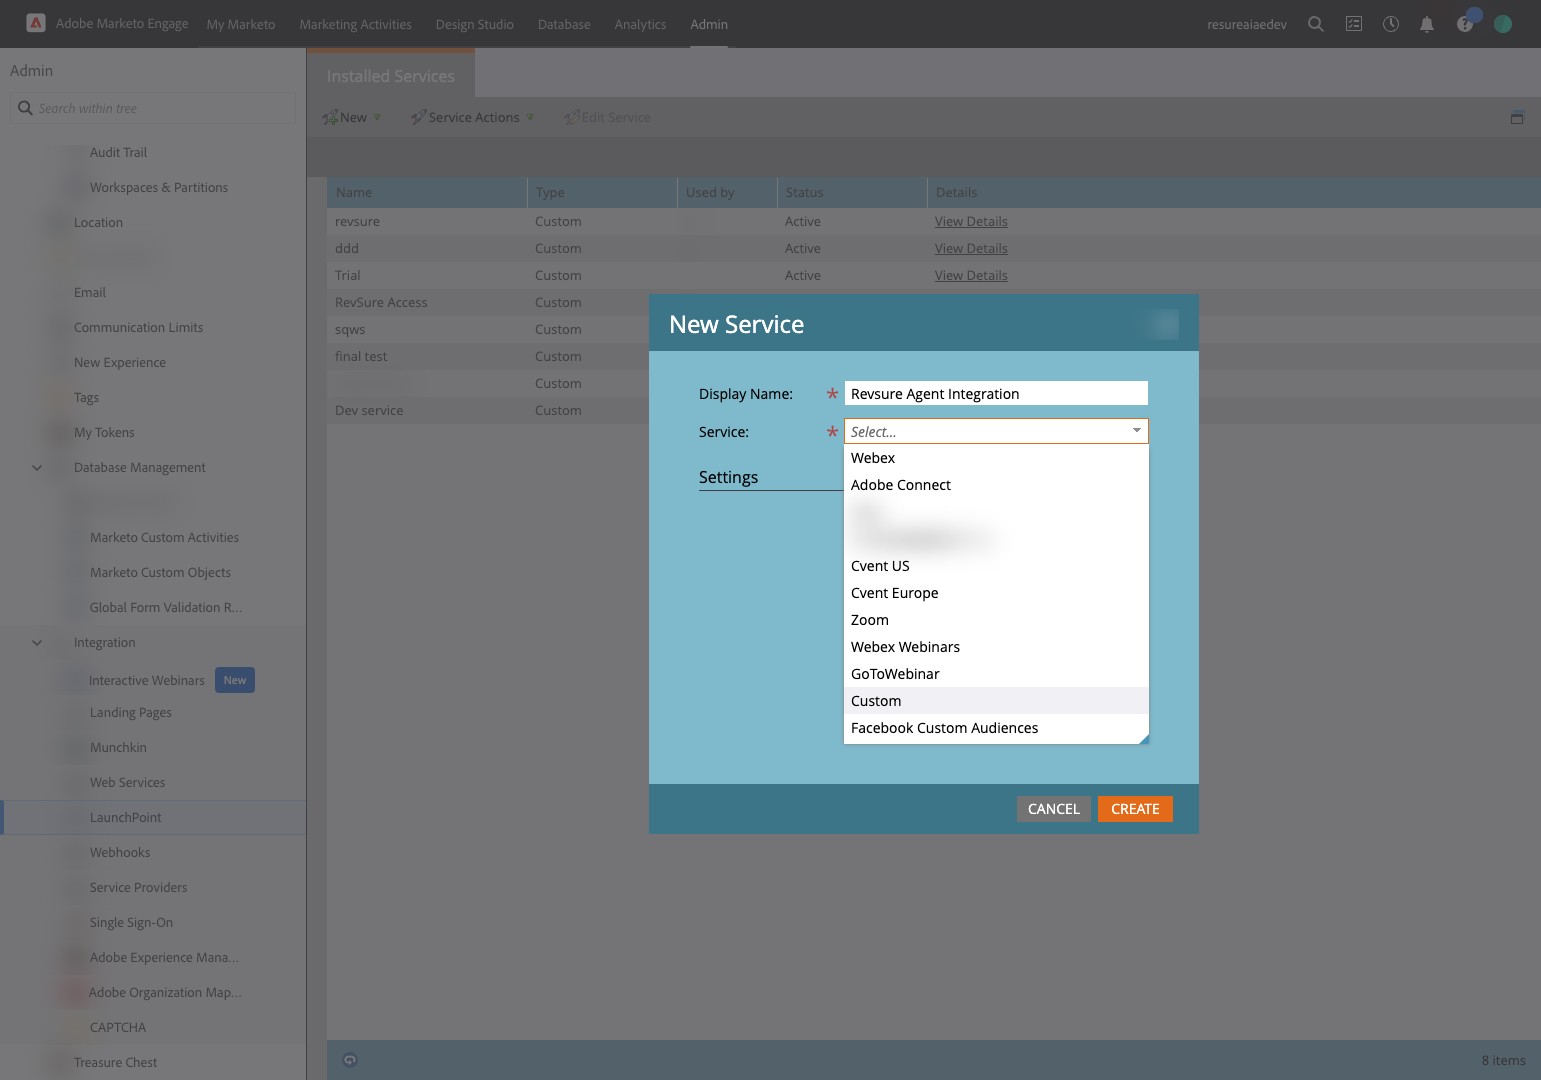
35. Click the "Service:" field.
36. Click the "Description:" field.

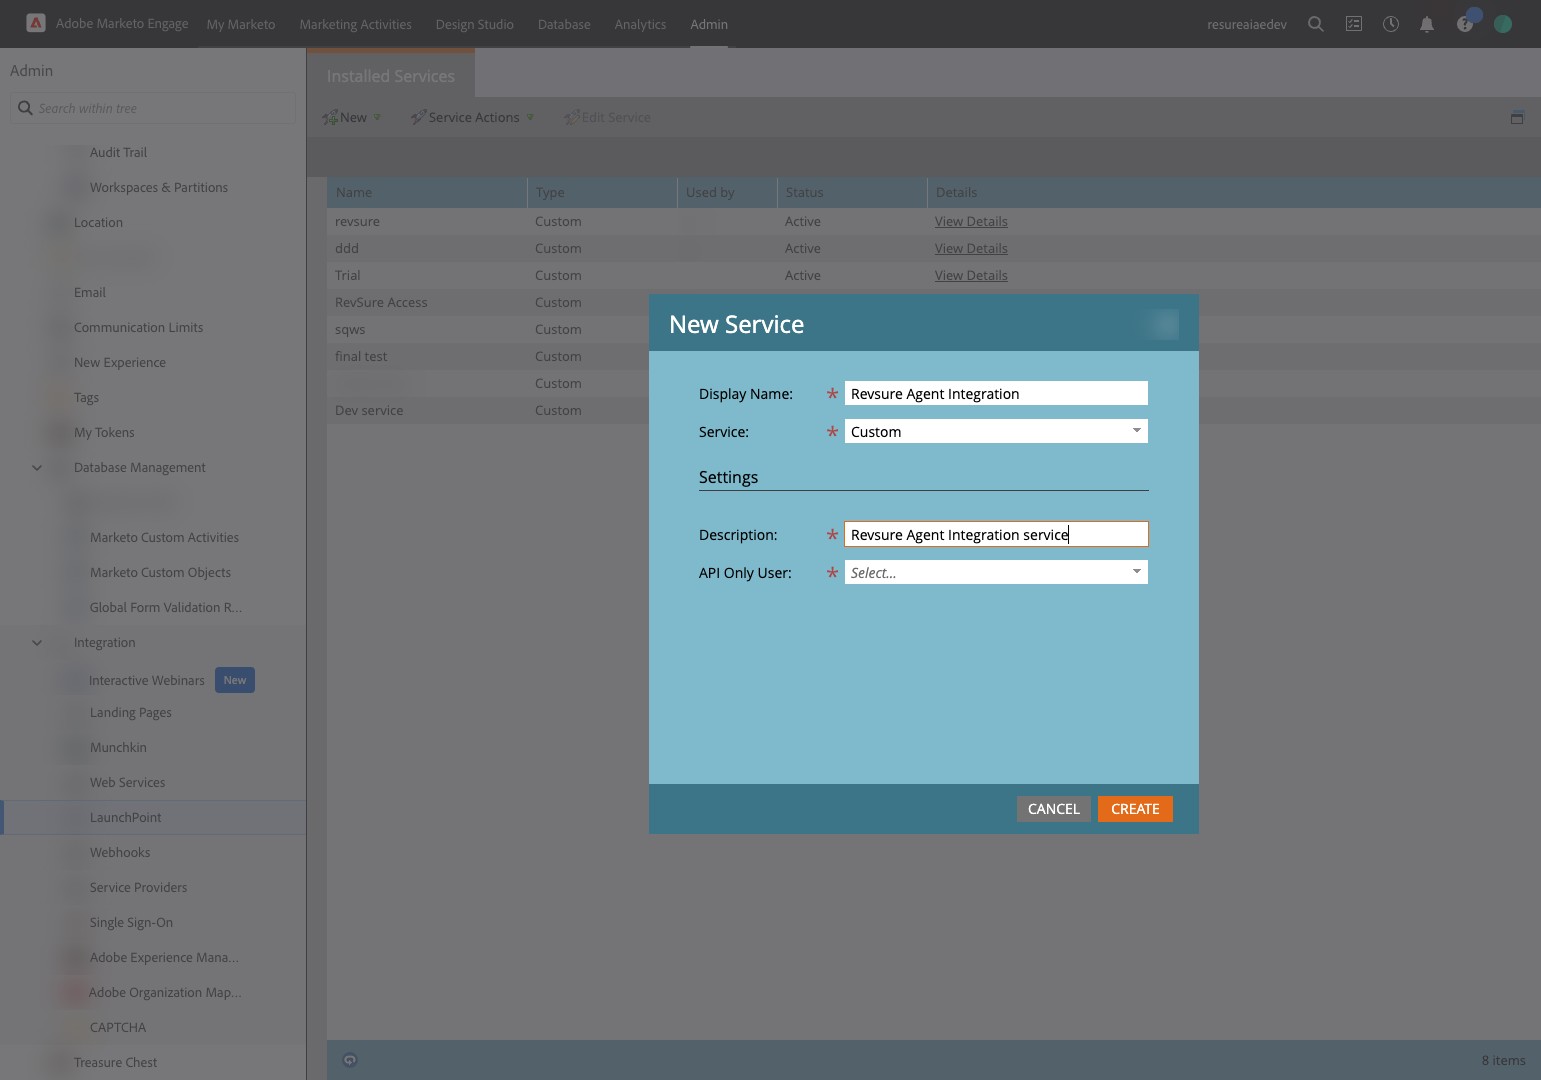
37. Type "Revsure Agent Integration service"
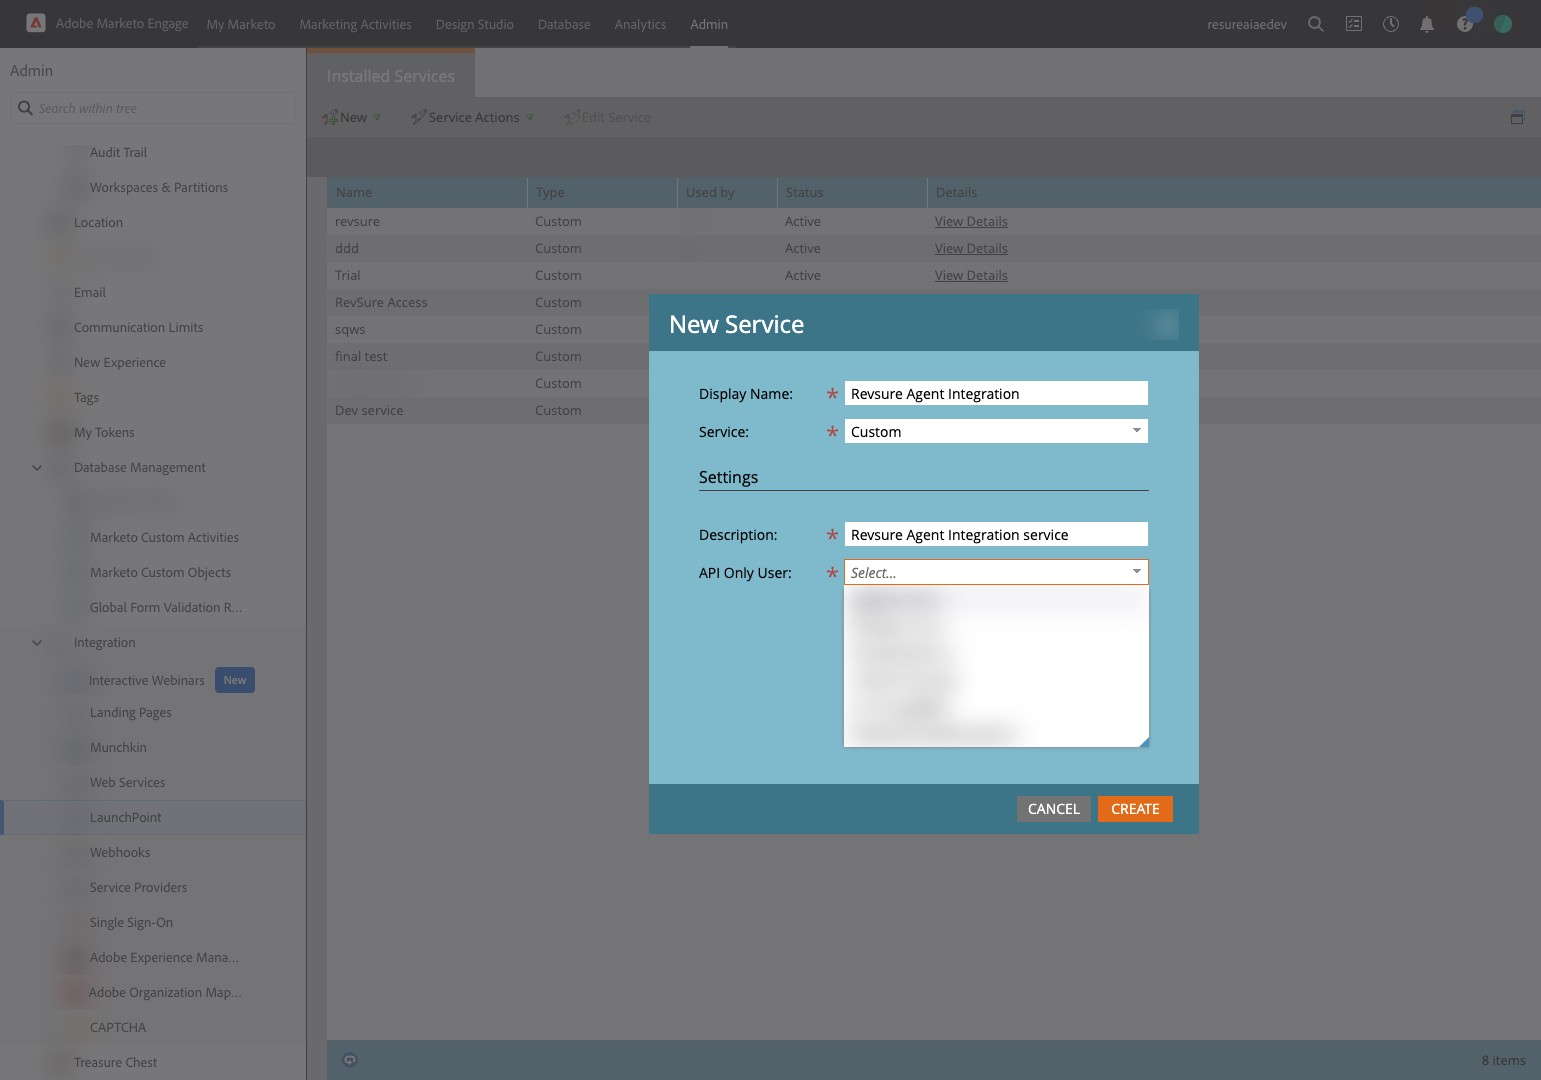
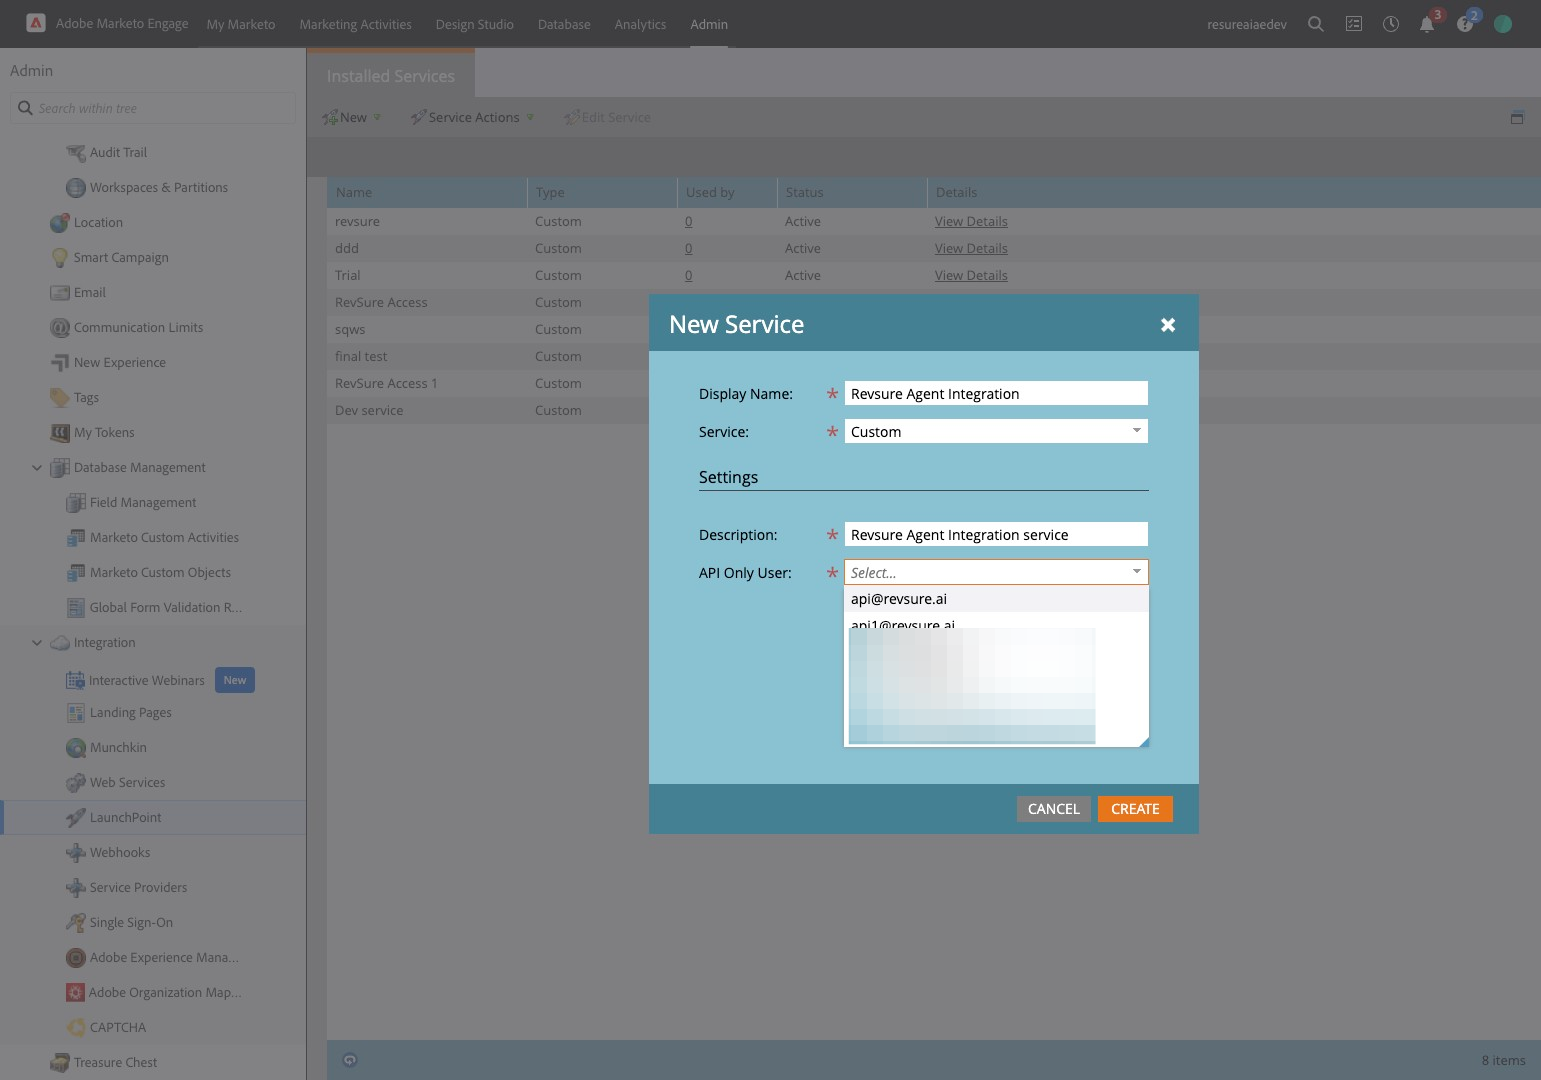
38. Click the "API Only User:" field.
39. Click "[email protected]"
40. Click "Create"
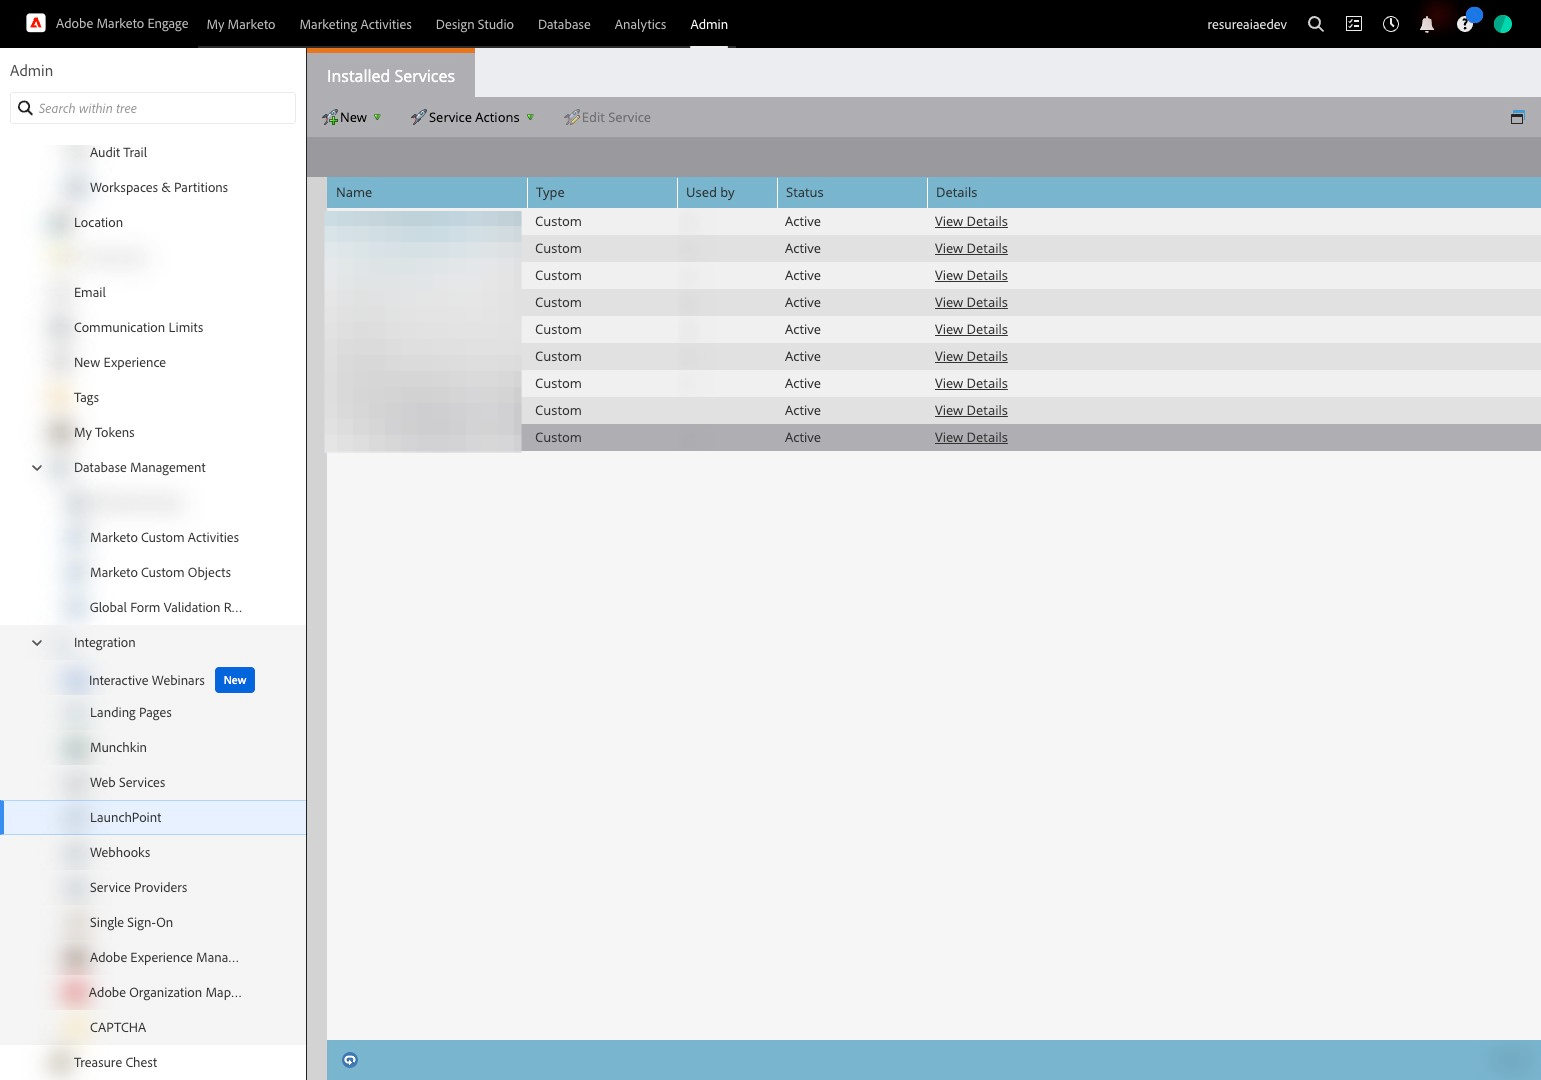
41. Click "View Details"
42. Copy Client ID
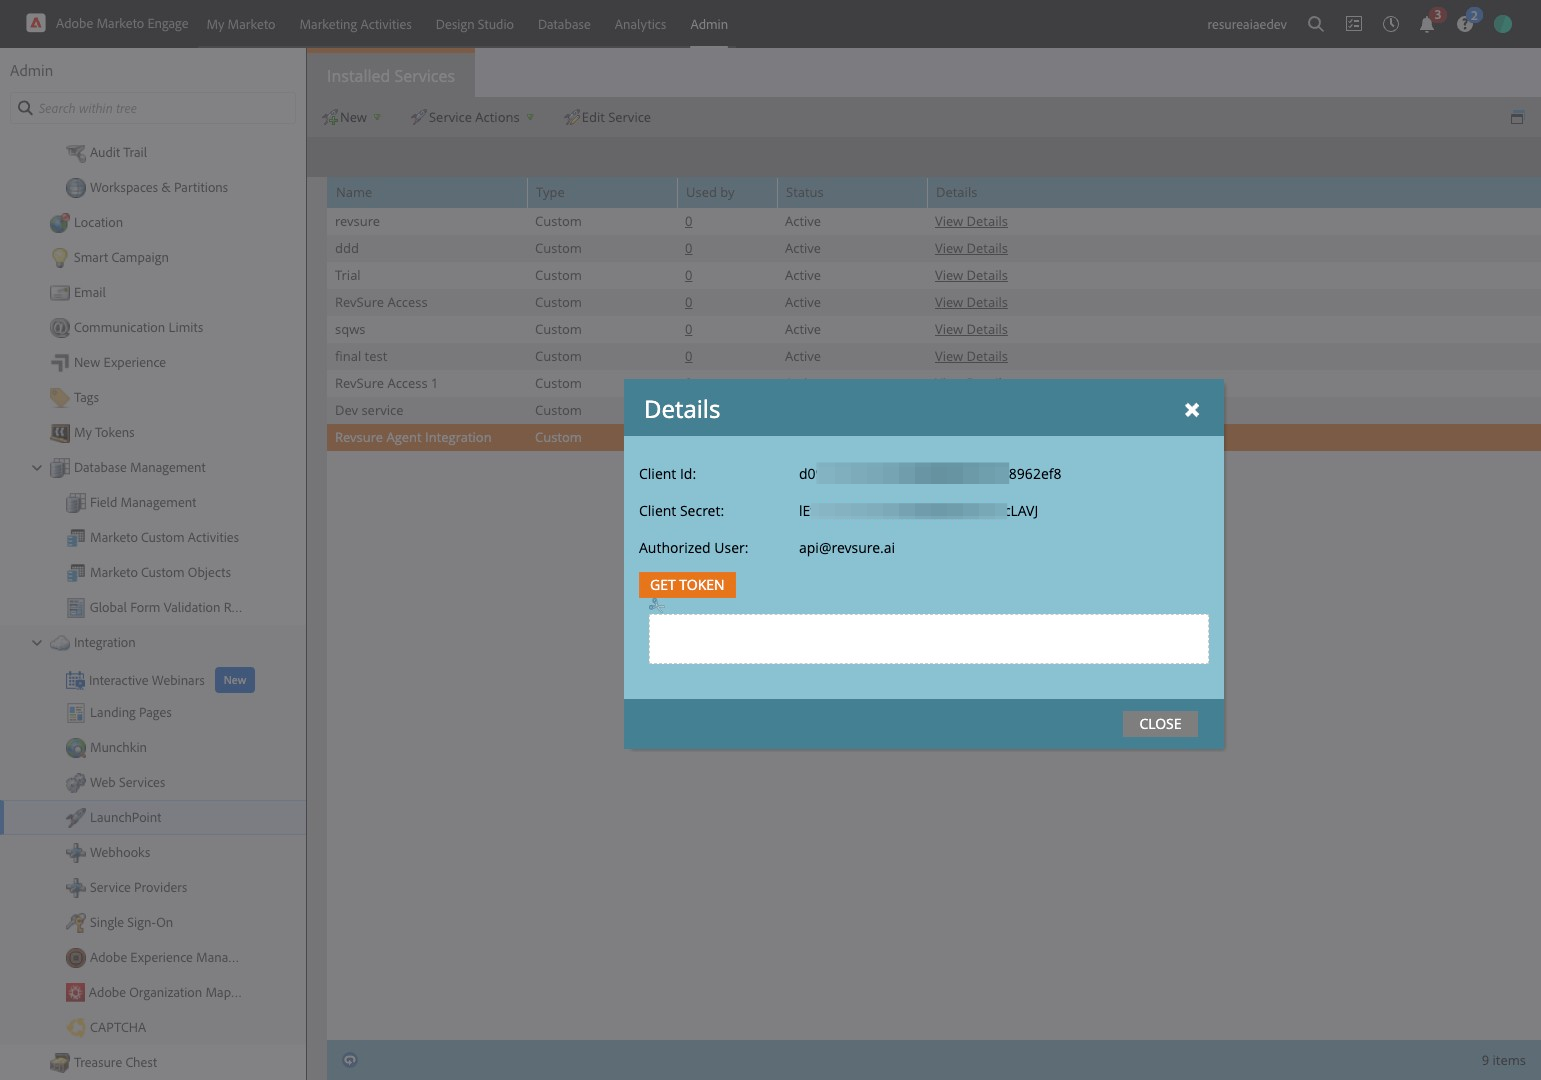
43. Paste copied Client ID
44. Copy Client Secret
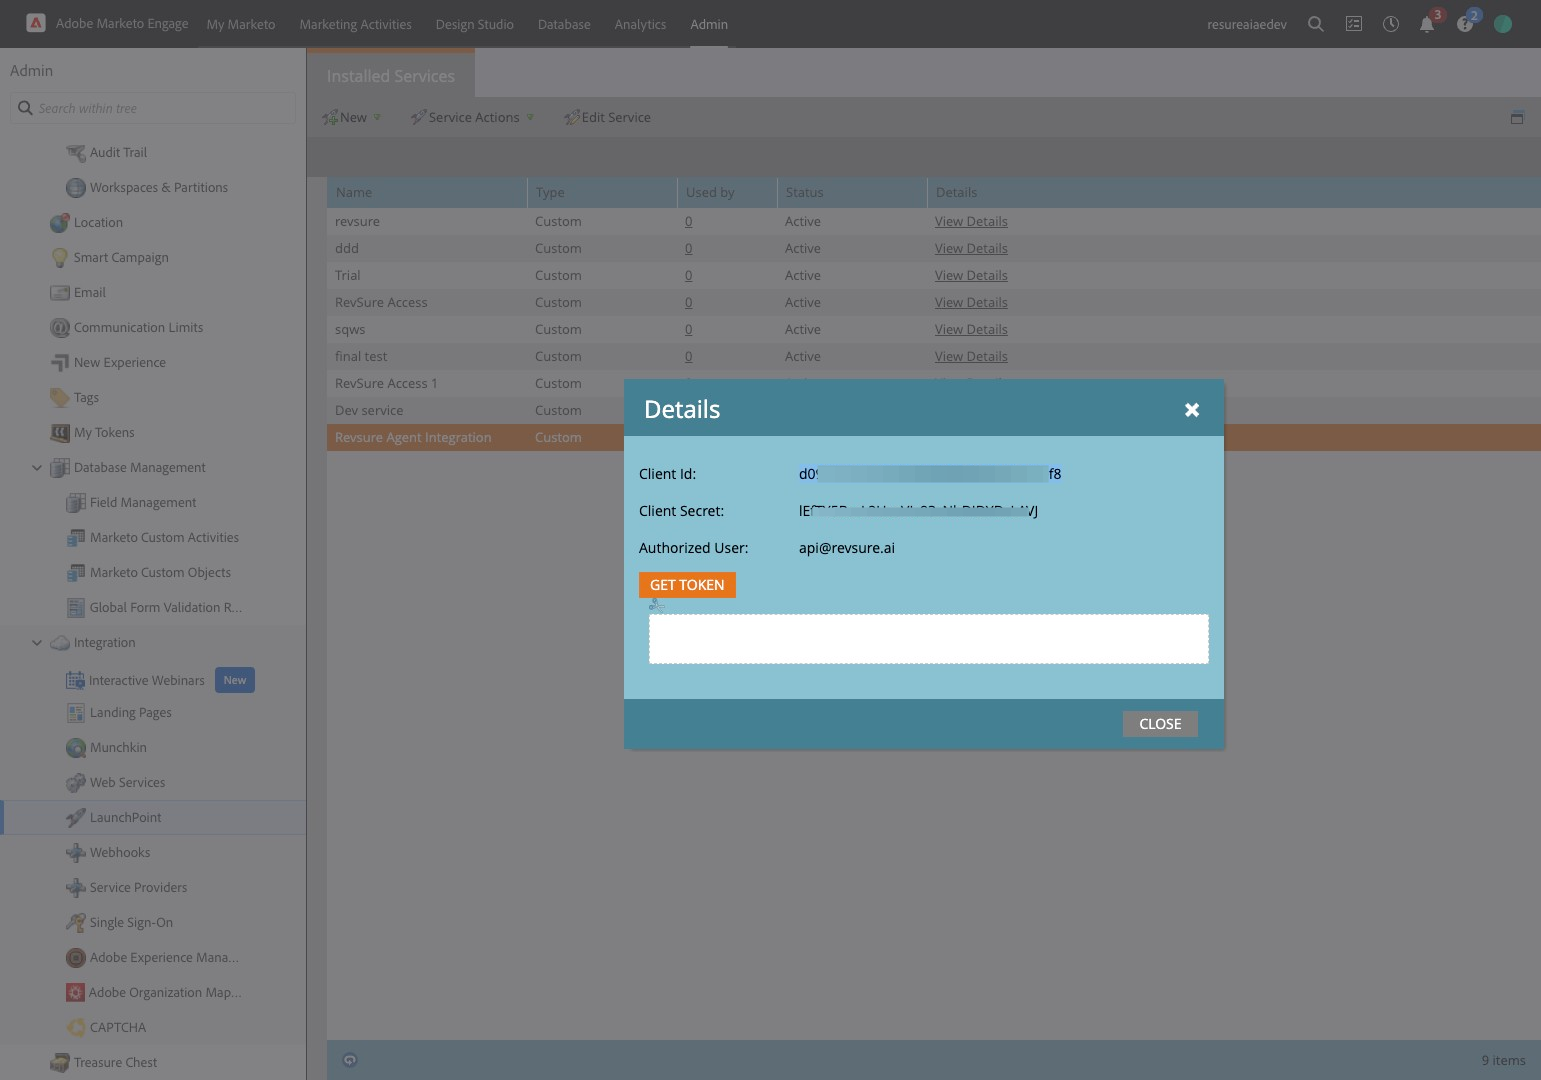
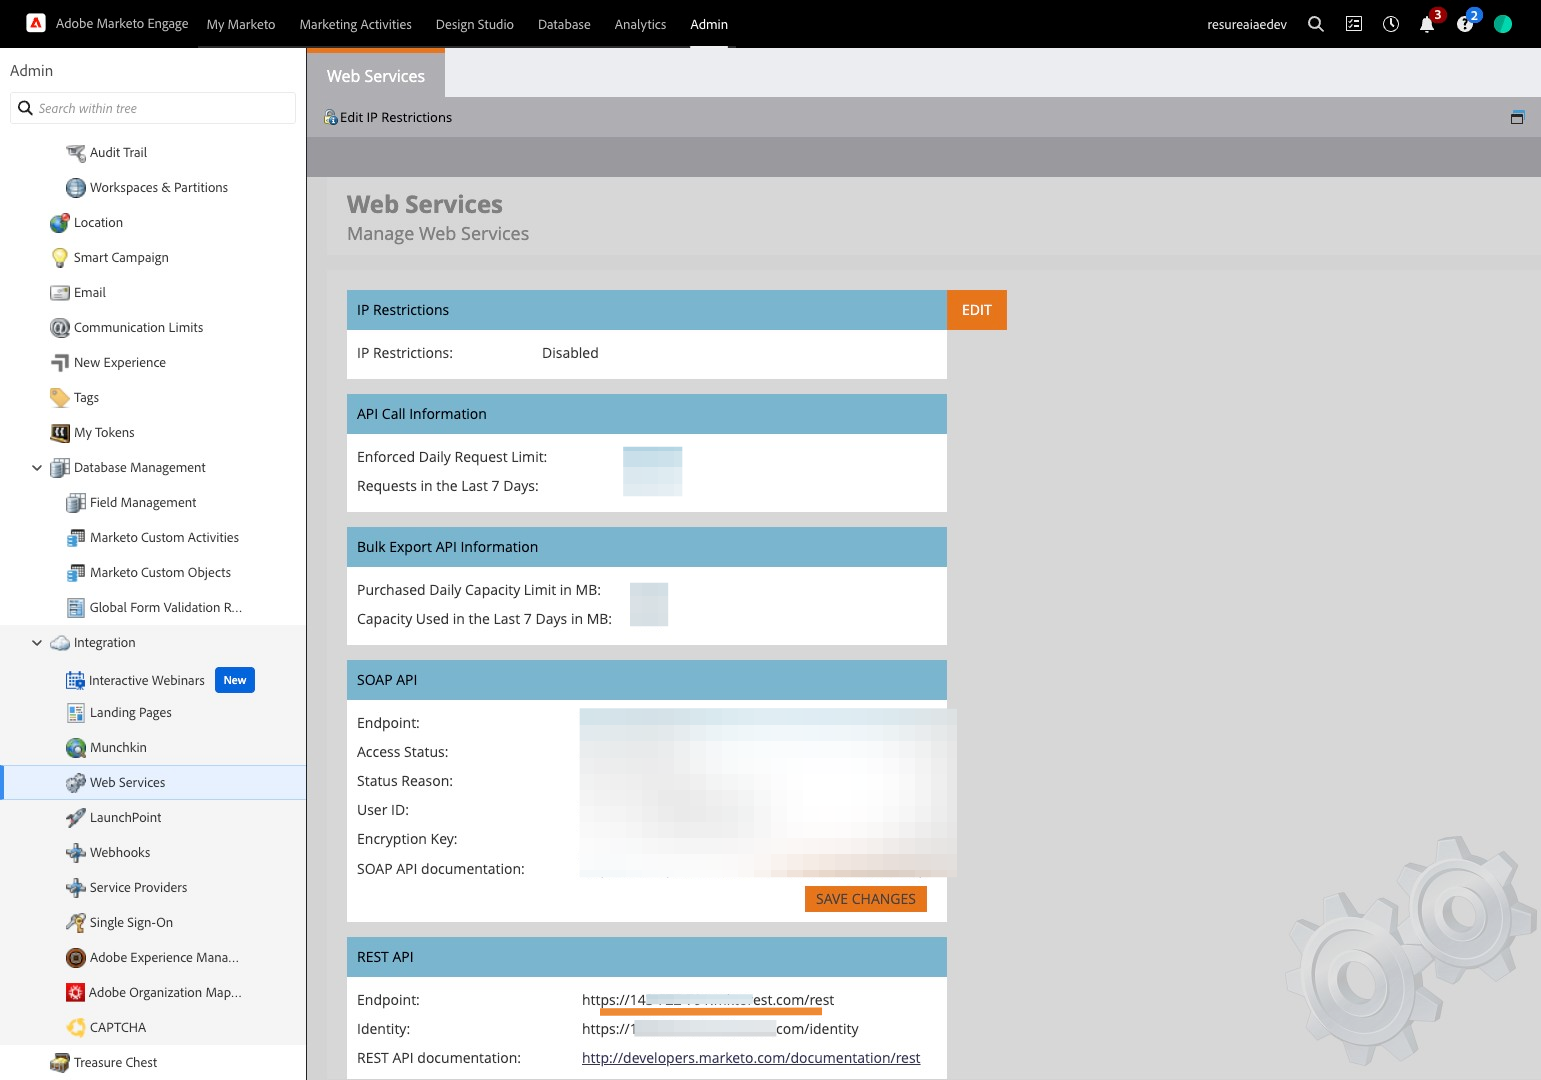
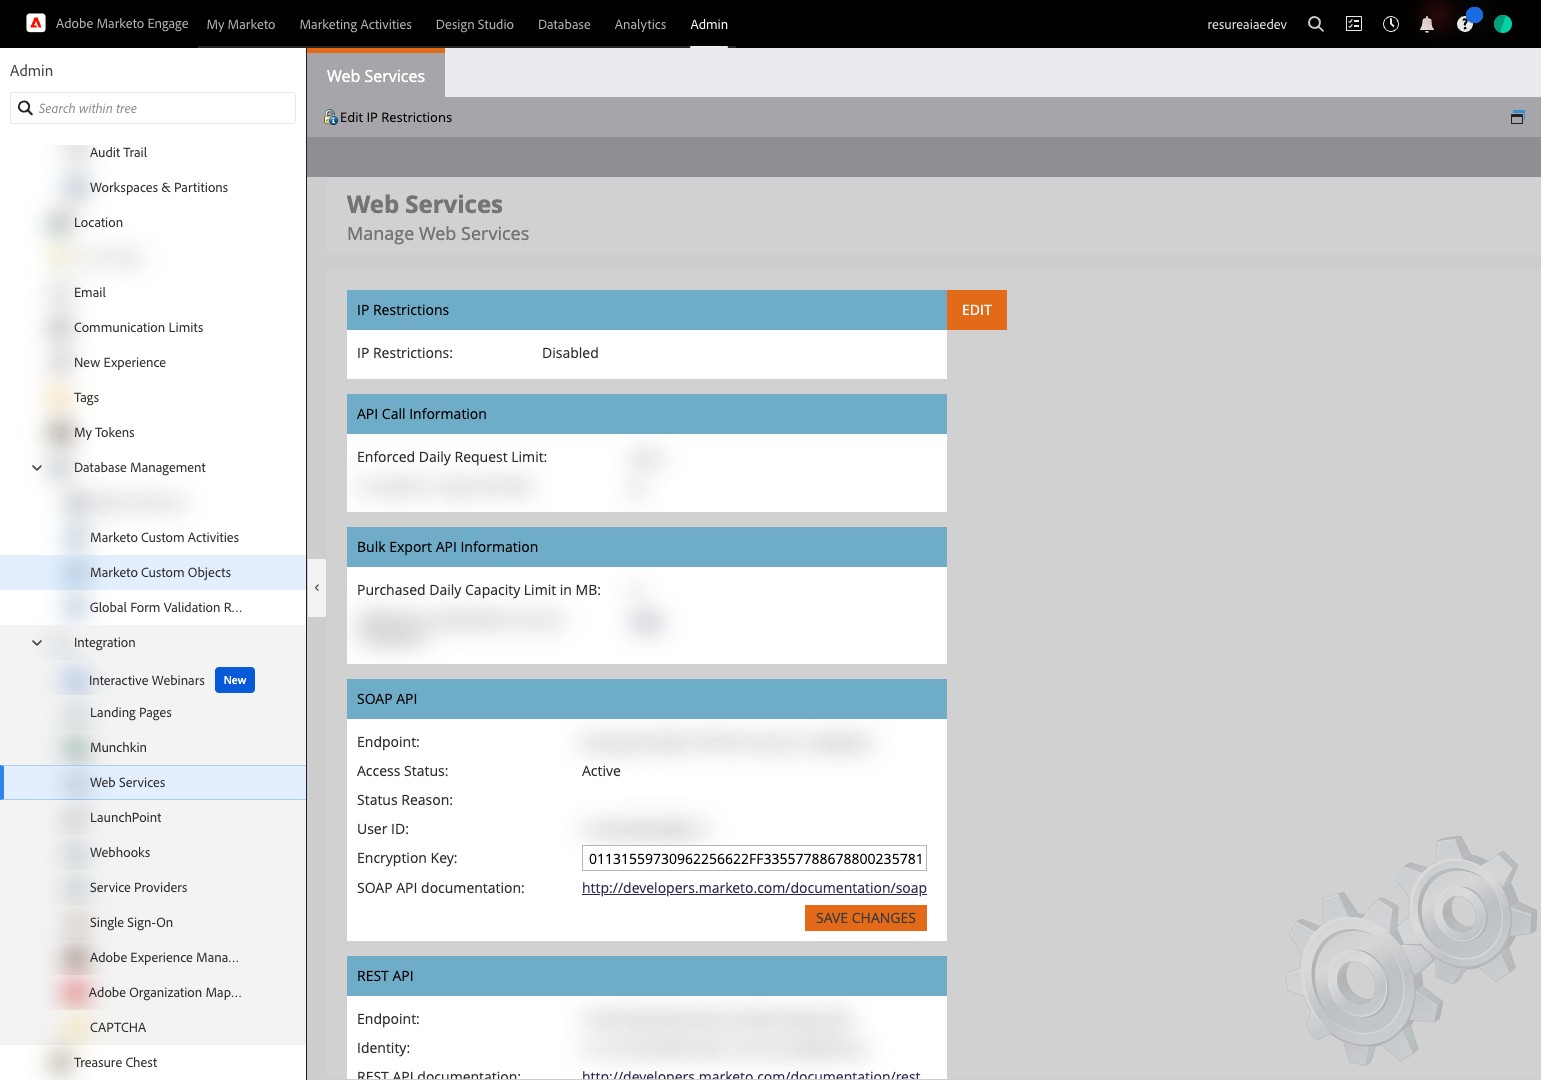
45. Paste the copied Client Secret

46. Navigate to Marketo and "Close"

47. Click "Web Services"
48. Copy Endpoint without /rest
49. Click the "Base Url *" field.

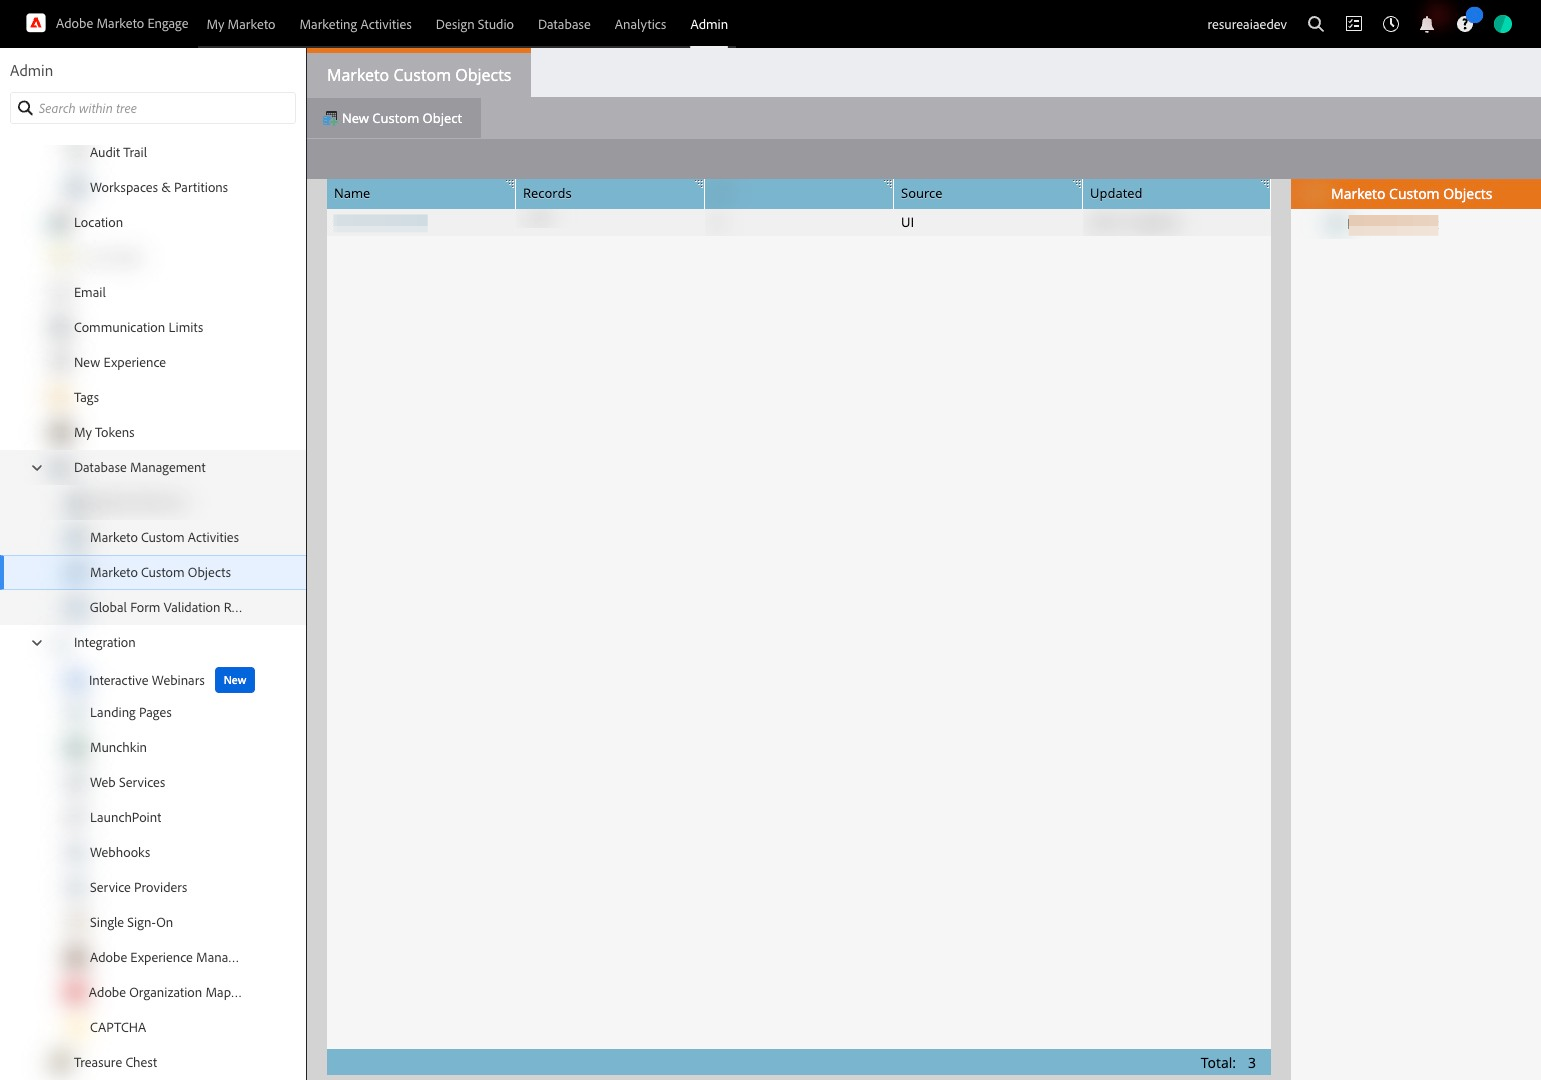
50. Paste the copied url

51. Click "Authorize"
52. Click "Marketo Custom Objects"
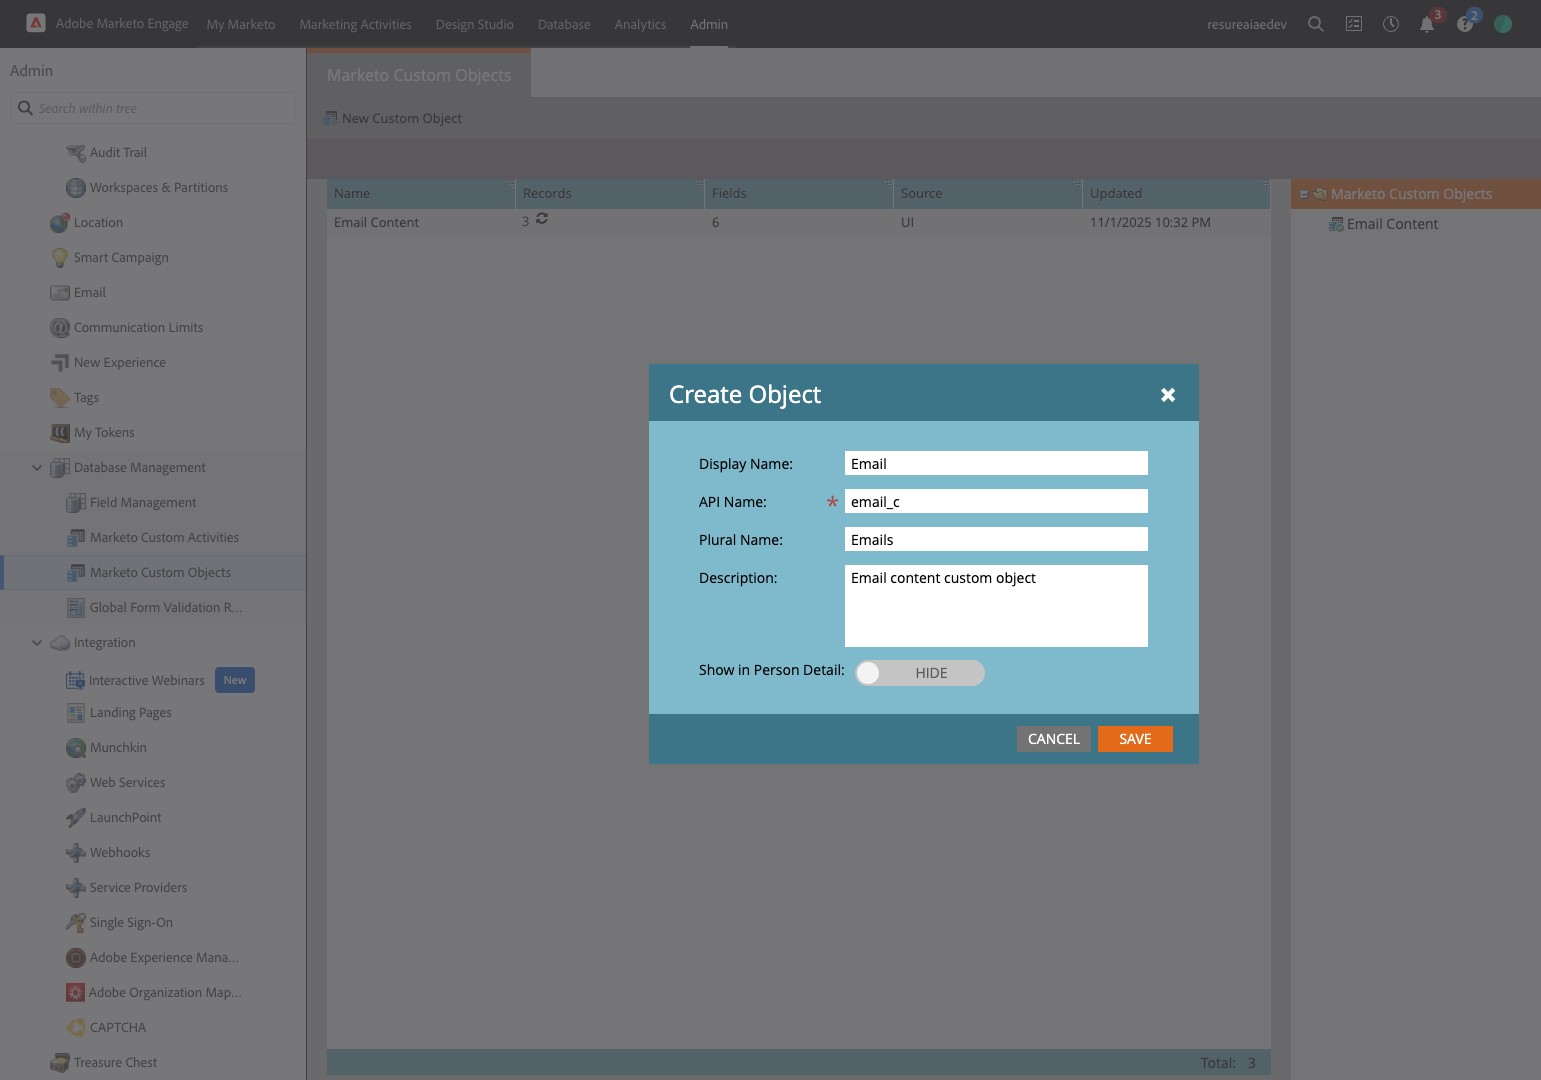
53. Guide for creating new custom object
54. Click "New Custom Object"
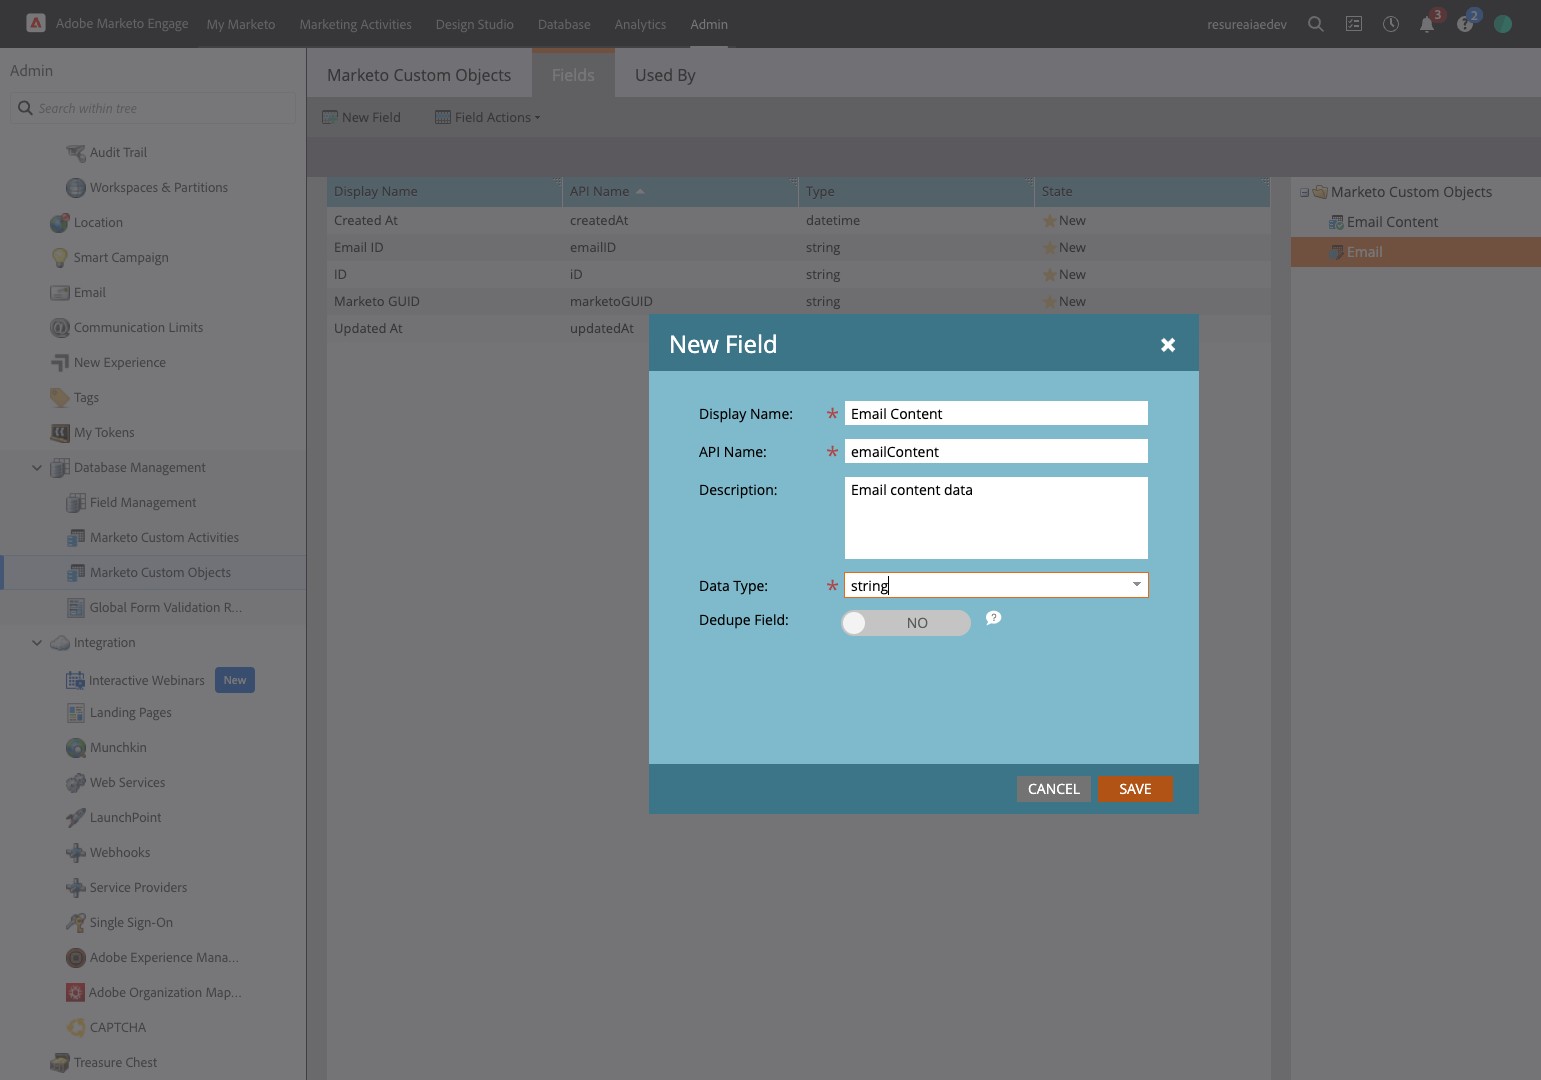
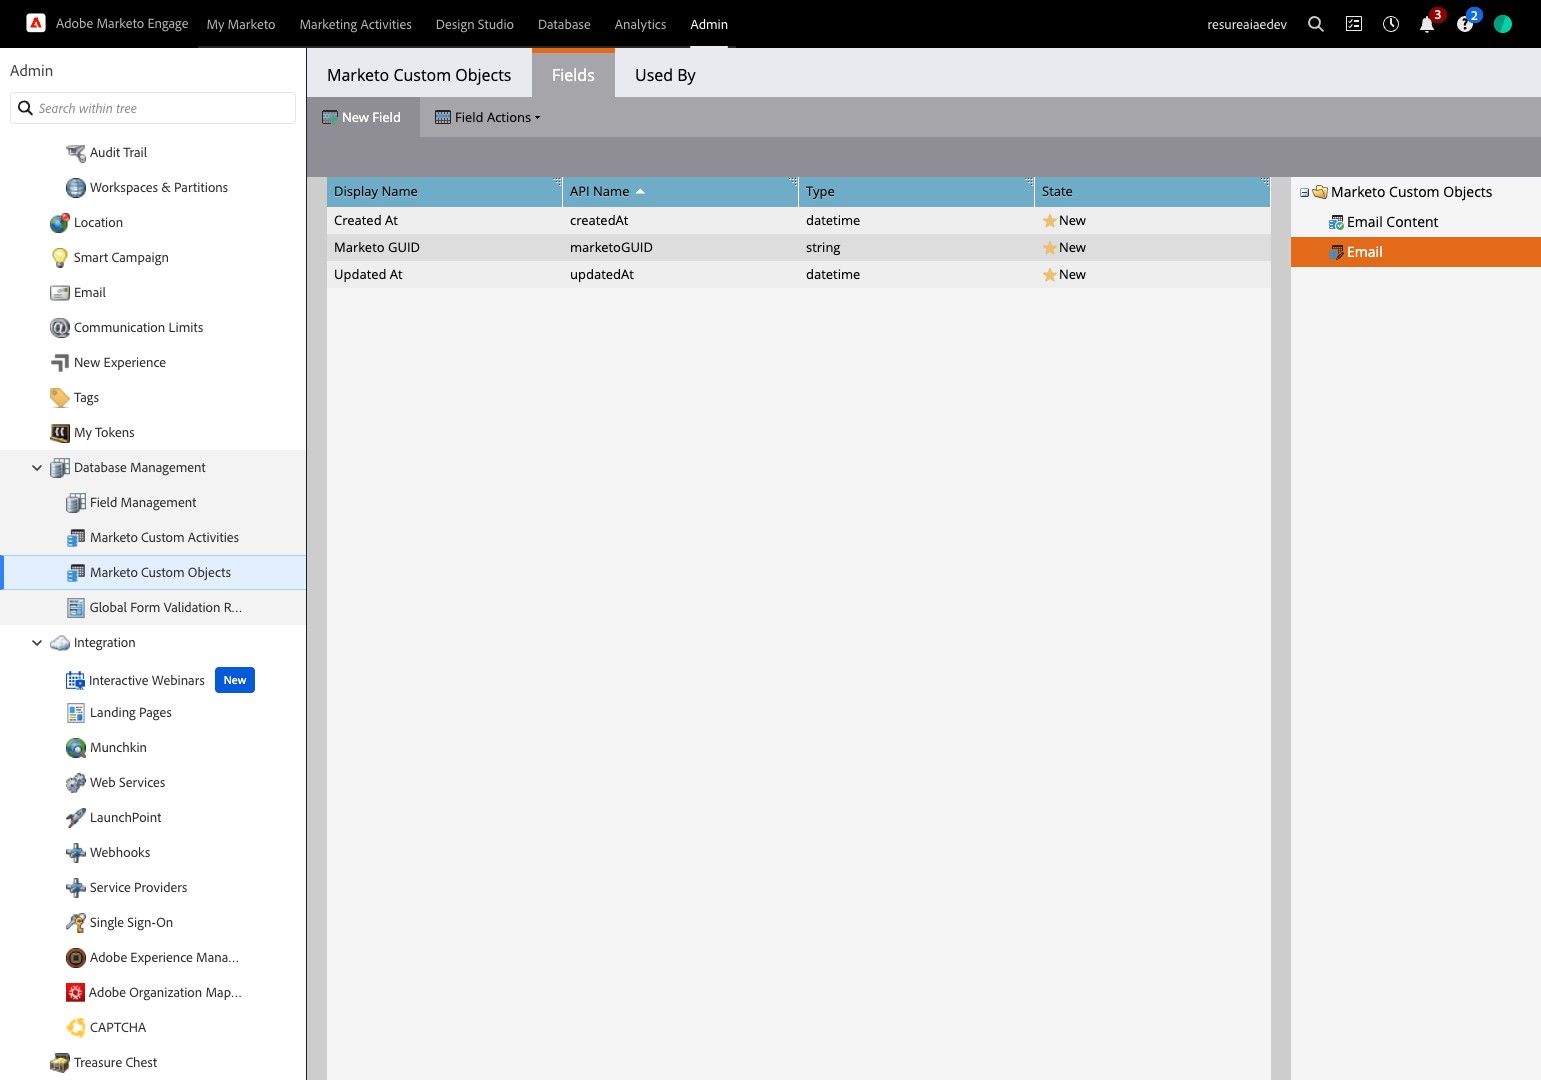
55. Add your custom object details and switch toggle if you want to show this in Person object
56. Click "Save"

57. Click "Fields"
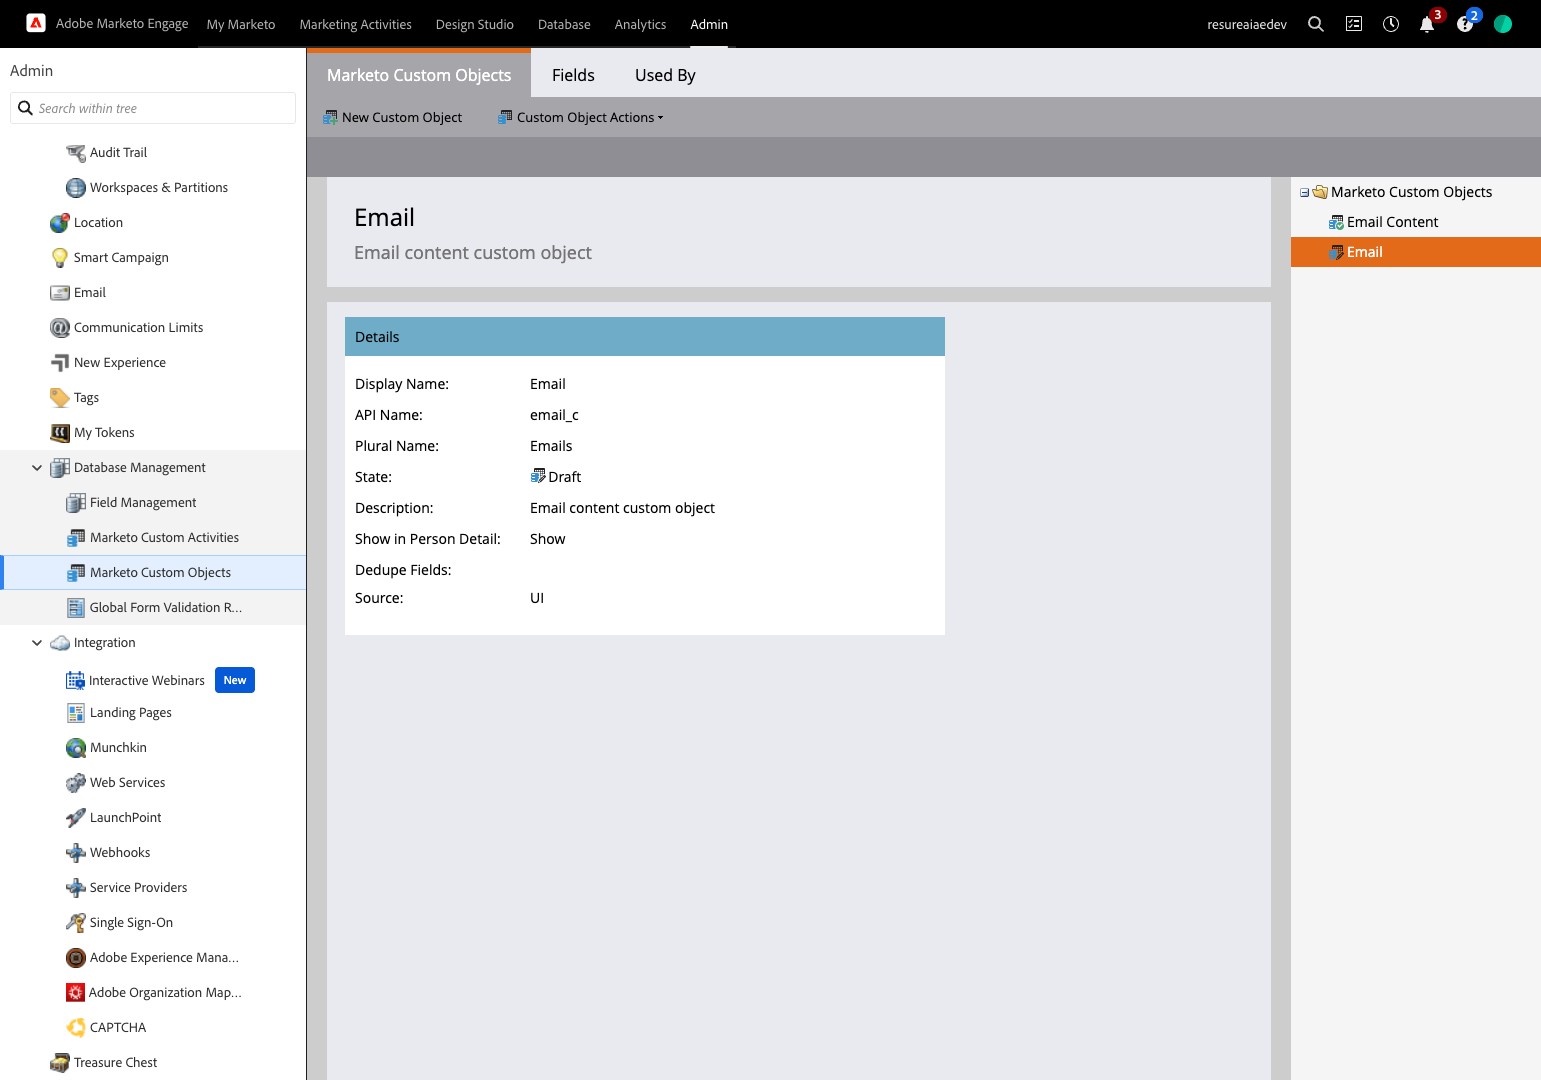
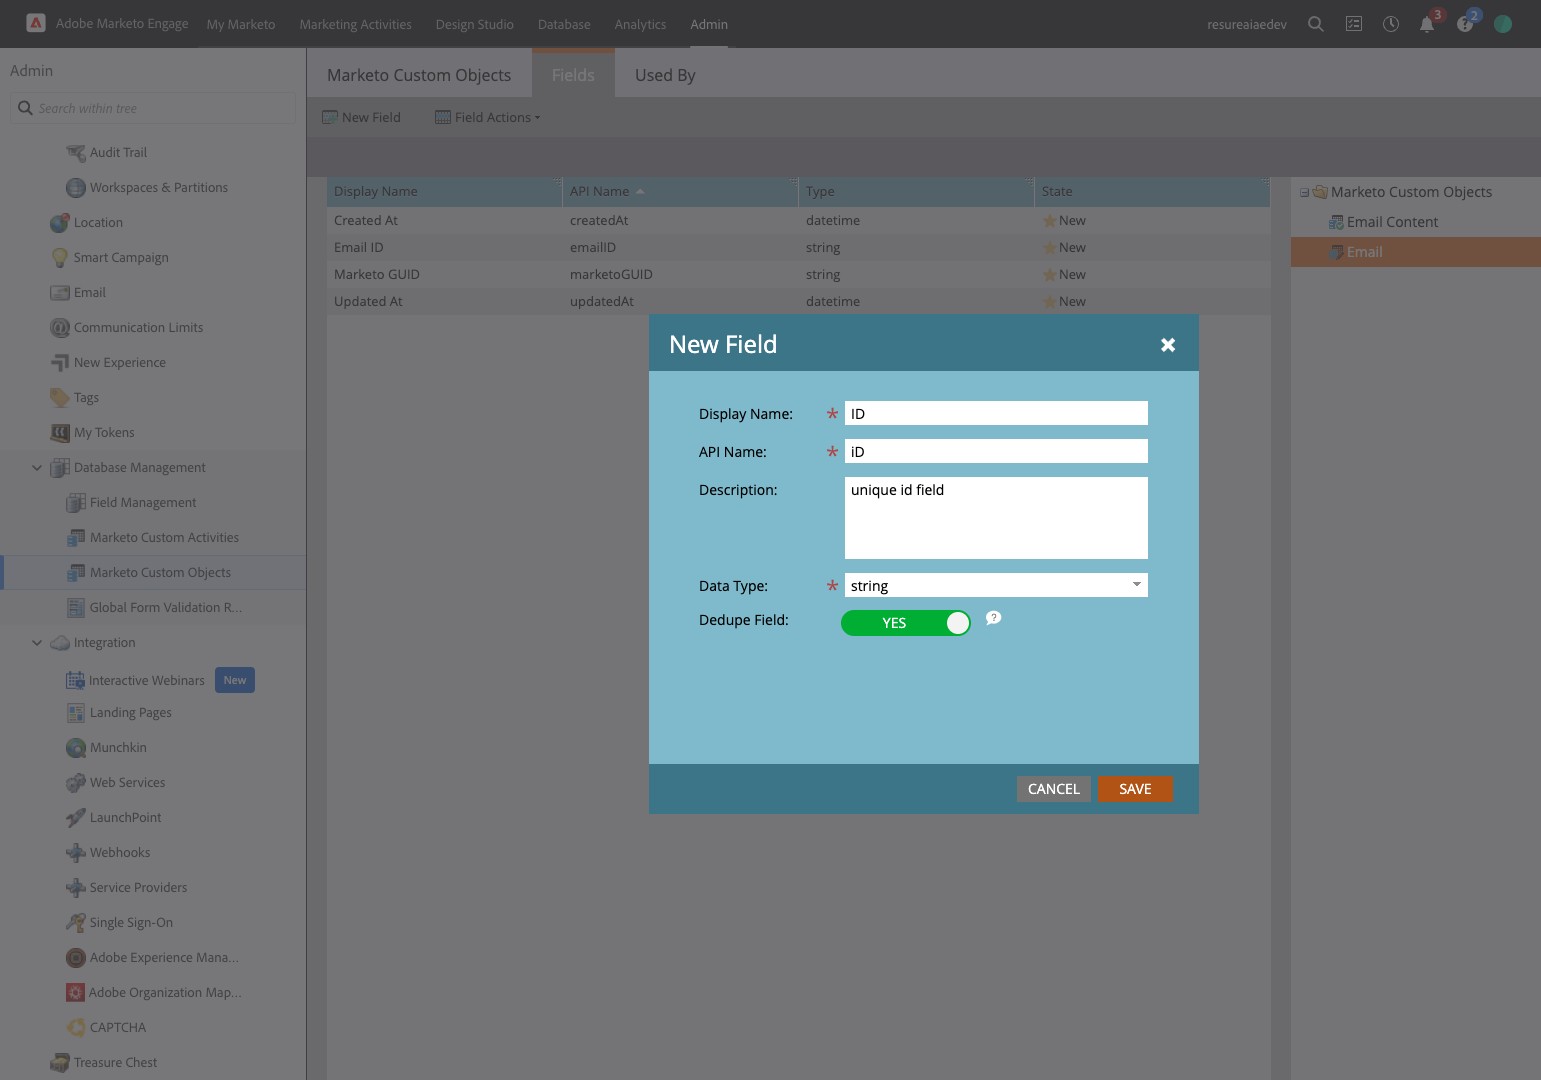
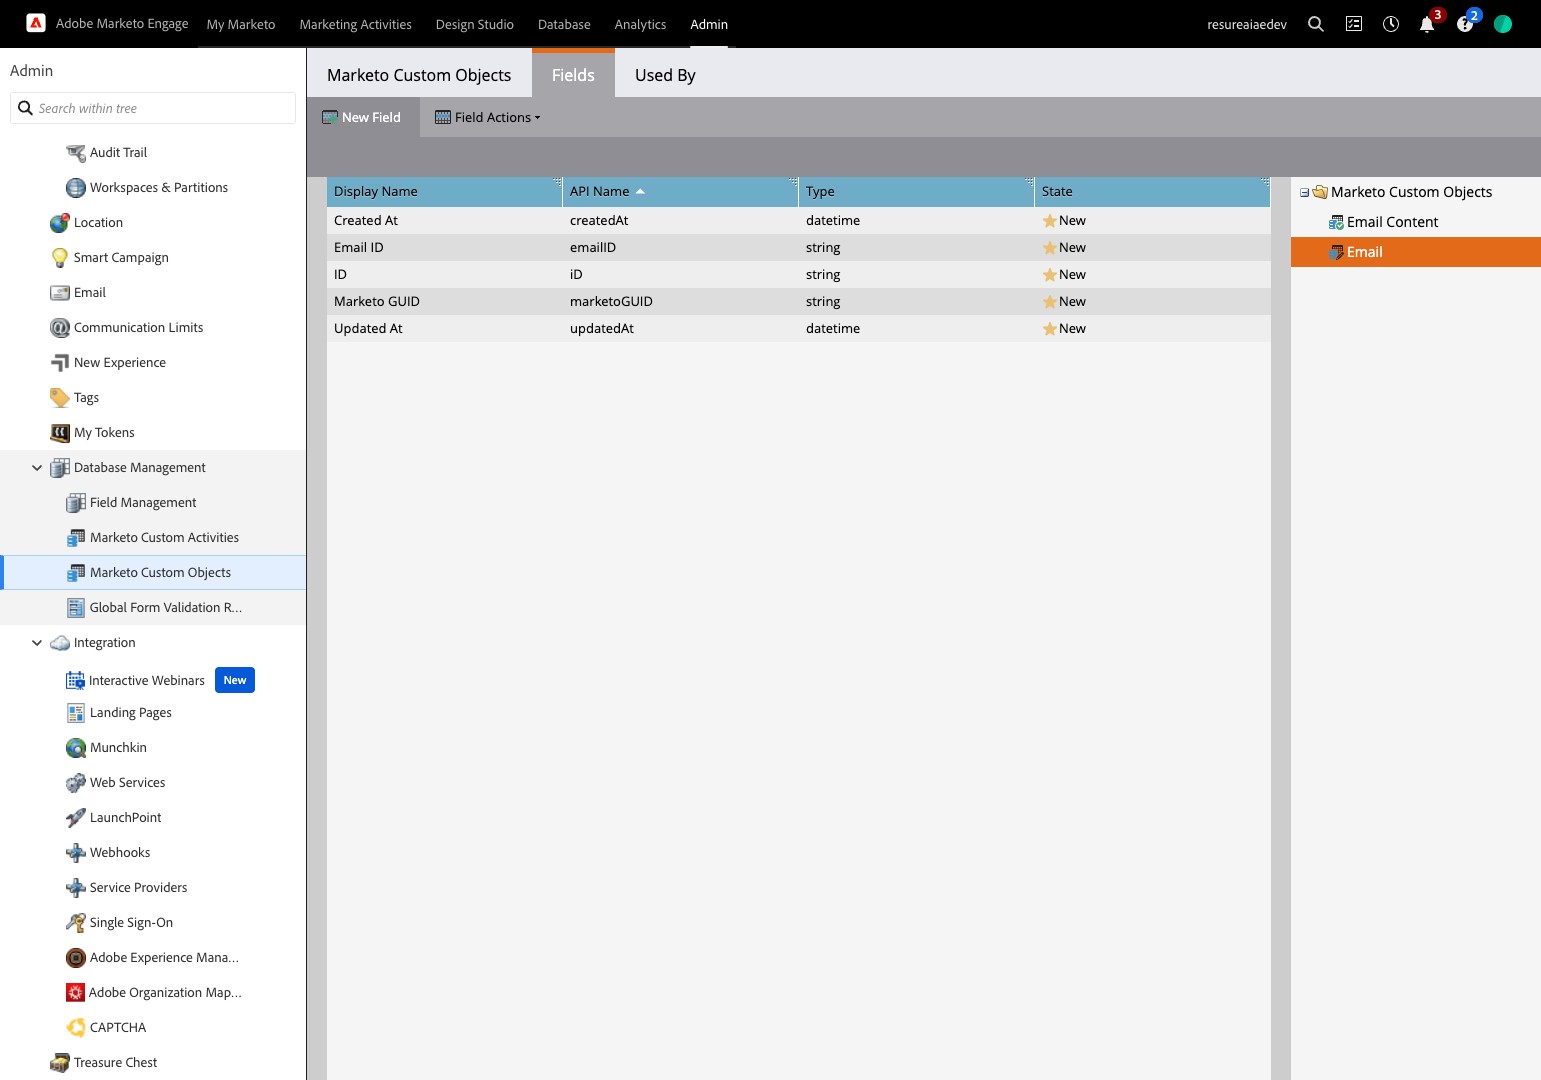
58. Click "New Field"
59. Add your fields and save them
60. Click "New Field"
61. Add other fields and save them too